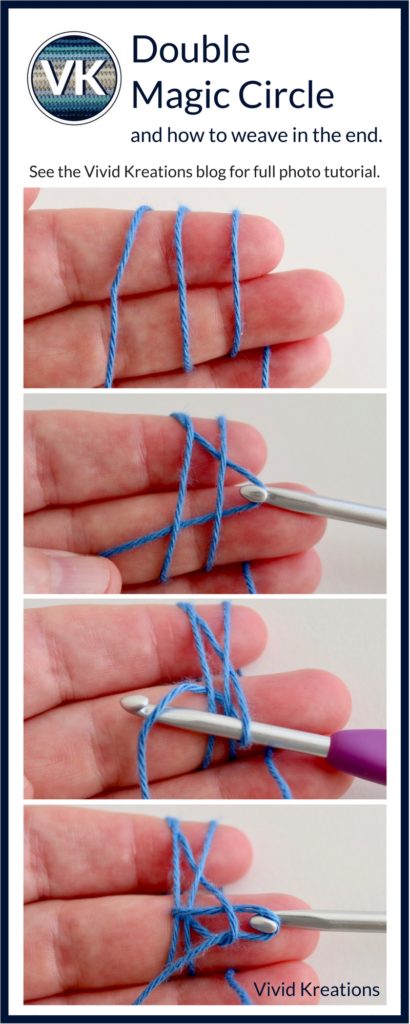
Today I am going to share one of my favourite techniques – the Double Magic Circle.
I love this technique, I find it easy to do and it looks great, so I’m going to show you how to do it too.
What is the Double Magic Circle?
 If you’ve been crocheting for a while you’ve probably heard of the magic circle and may have some idea of what it entails, but if you don’t here is a simple description.
The magic circle/magic ring/adjustable loop is a way to begin a crochet project worked in the round that replaces a ch ?(2, 3, etc) and join into a ring.
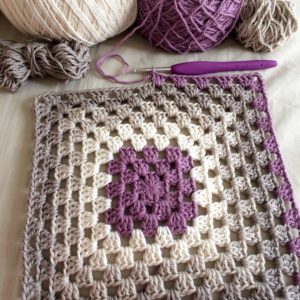
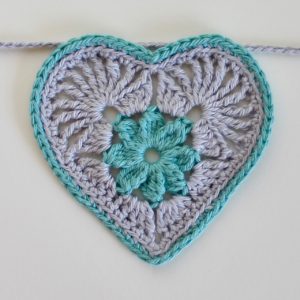
This technique allows you to work your stitches into a larger circle and then tighten it until the hole disappears (like in the centre of a granny square) or leave a hole with the diameter you want (like in the centre of the Heart in Bloom).
How is the Double Magic Circle different?
Well just like the name suggests it is a double circle. You wrap the yarn around your fingers twice so that you are working into a circle made of two loops of yarn instead of just one.
I prefer the double magic circle for a number of reasons.
- I find it easier to manage – easier to make and far easier to work into.
- It’s sturdier – which makes it easier to work into and a stronger beginning to a project.
- It leaves a long tail – perfect for securely weaving in.
- It’s already woven in more – which for me is important as I’m always paranoid my ends will come loose!
Speaking of weaving the end in, one of the things that many people worry about when using a magic circle is that it will come undone. So I’m also going to show you my method of weaving in the end when using a magic circle, using all the little tricks I’ve seen over the years, so that it is as secure as it can be without having to tie any knots.
This tutorial will be broken down into 2 parts.
A step by step photo tutorial and written instructions to help you make and use a Double Magic Circle.
A photo tutorial and chart illustrating how to weave the end in securely.
Tutorial – the Double Magic Circle.
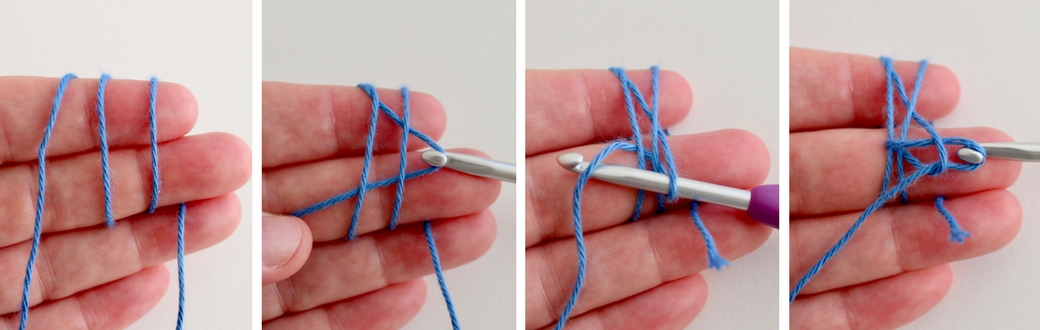
- Make the Double Magic Circle (DMC).
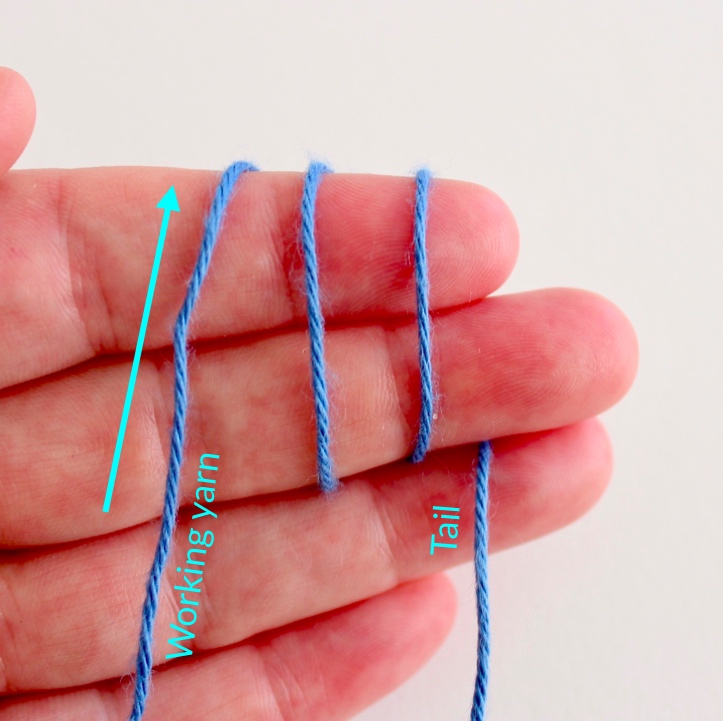
Wrap yarn over the top and around 2 fingers twice. 
Insert hook under the 2 loops, grab working yarn and pull back through. (1 loop on hook) 
Grab working yarn (go over the 2 loops this time). 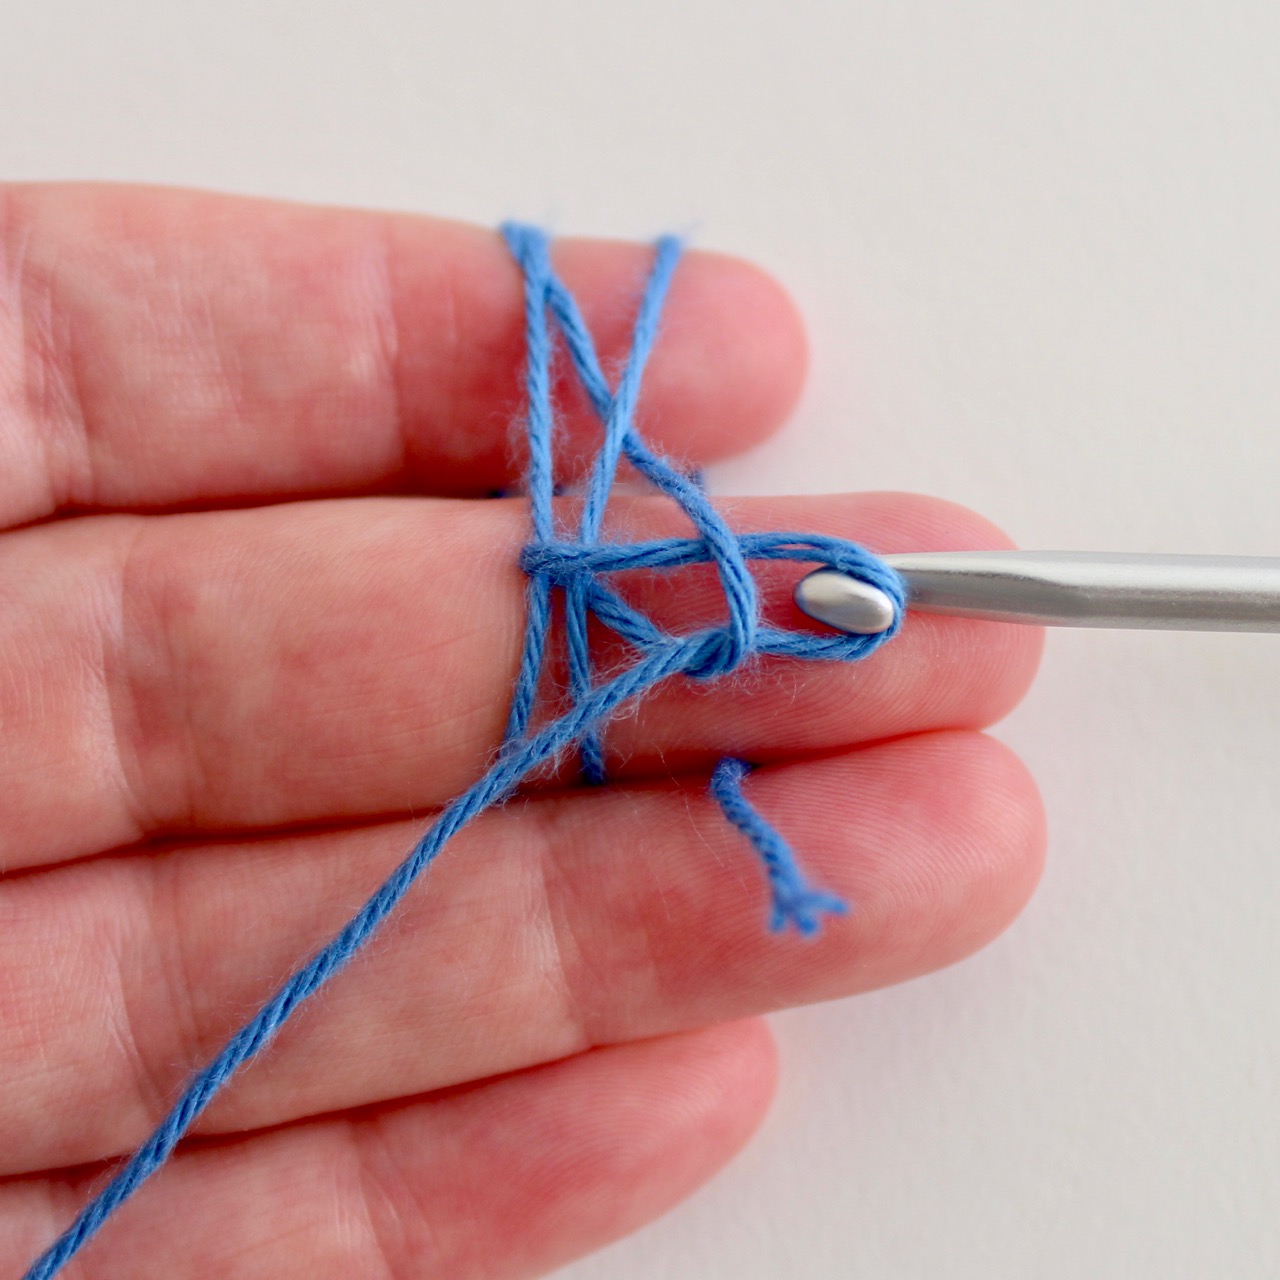
And pull working yarn though loop on hook. This makes a slip stitch around the 2 loops of your Double Magic Circle. 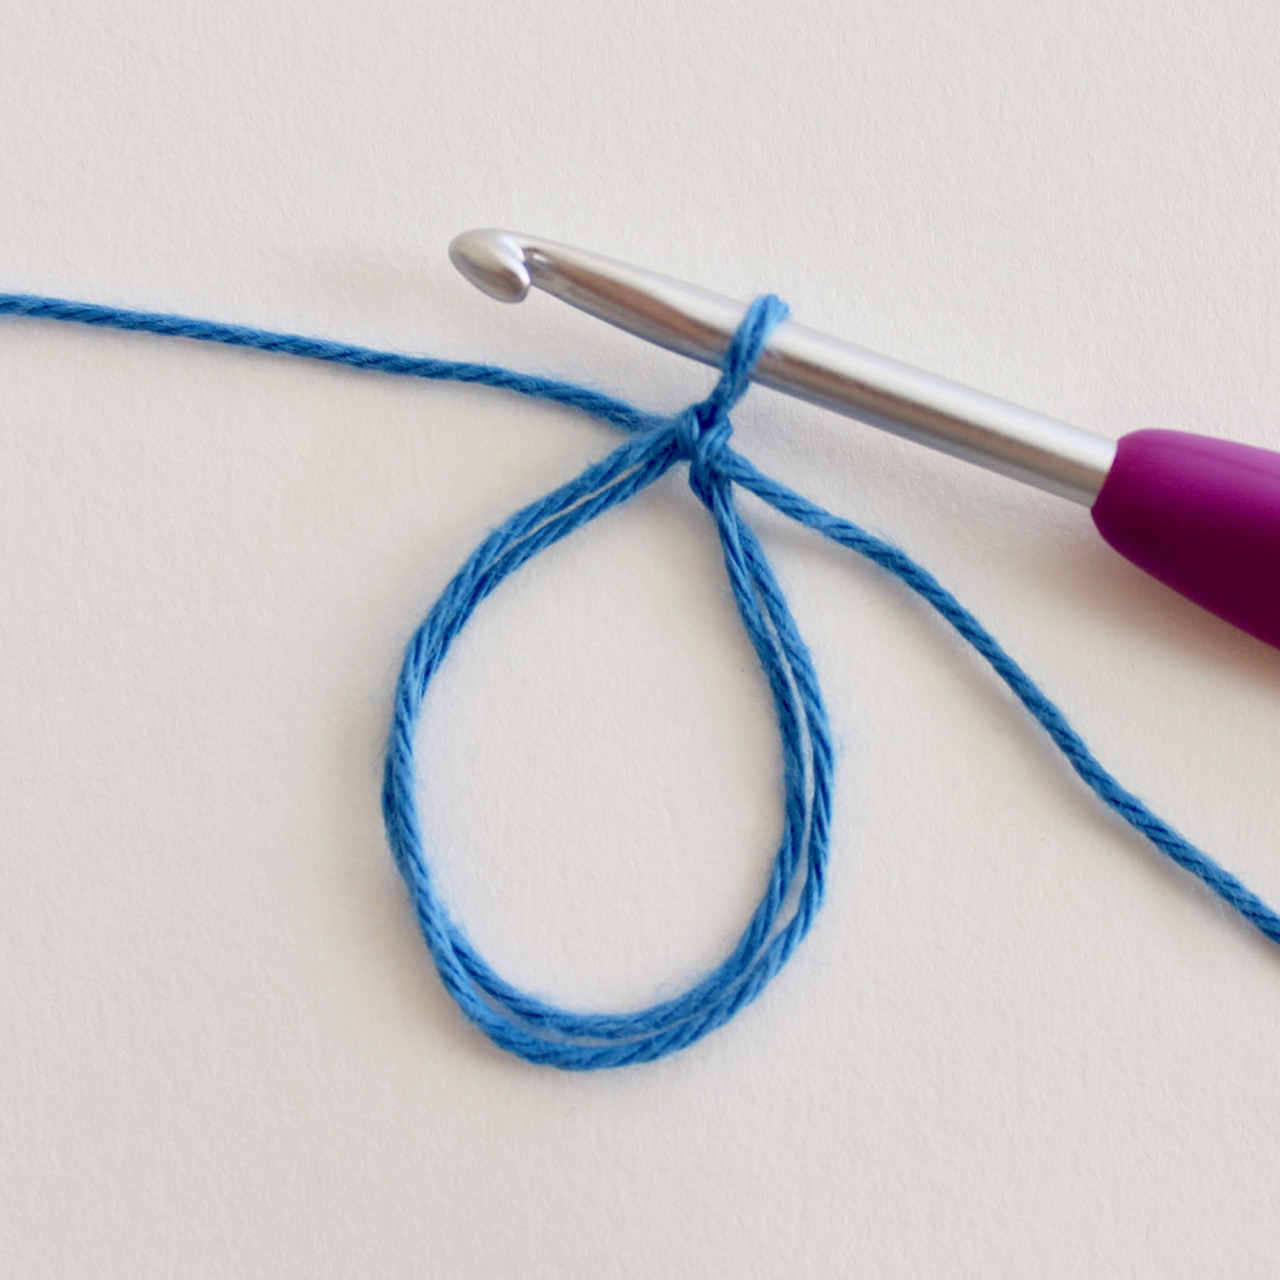
Pull slip stitch tight. Your DMC is ready to use. You have 2 loops to work into with the working yarn to the left and tail to the right. - Complete the first round working into the DMC. You can begin your round with a ch 2 or 3, or a Chainless Turning stitch – whichever you prefer.
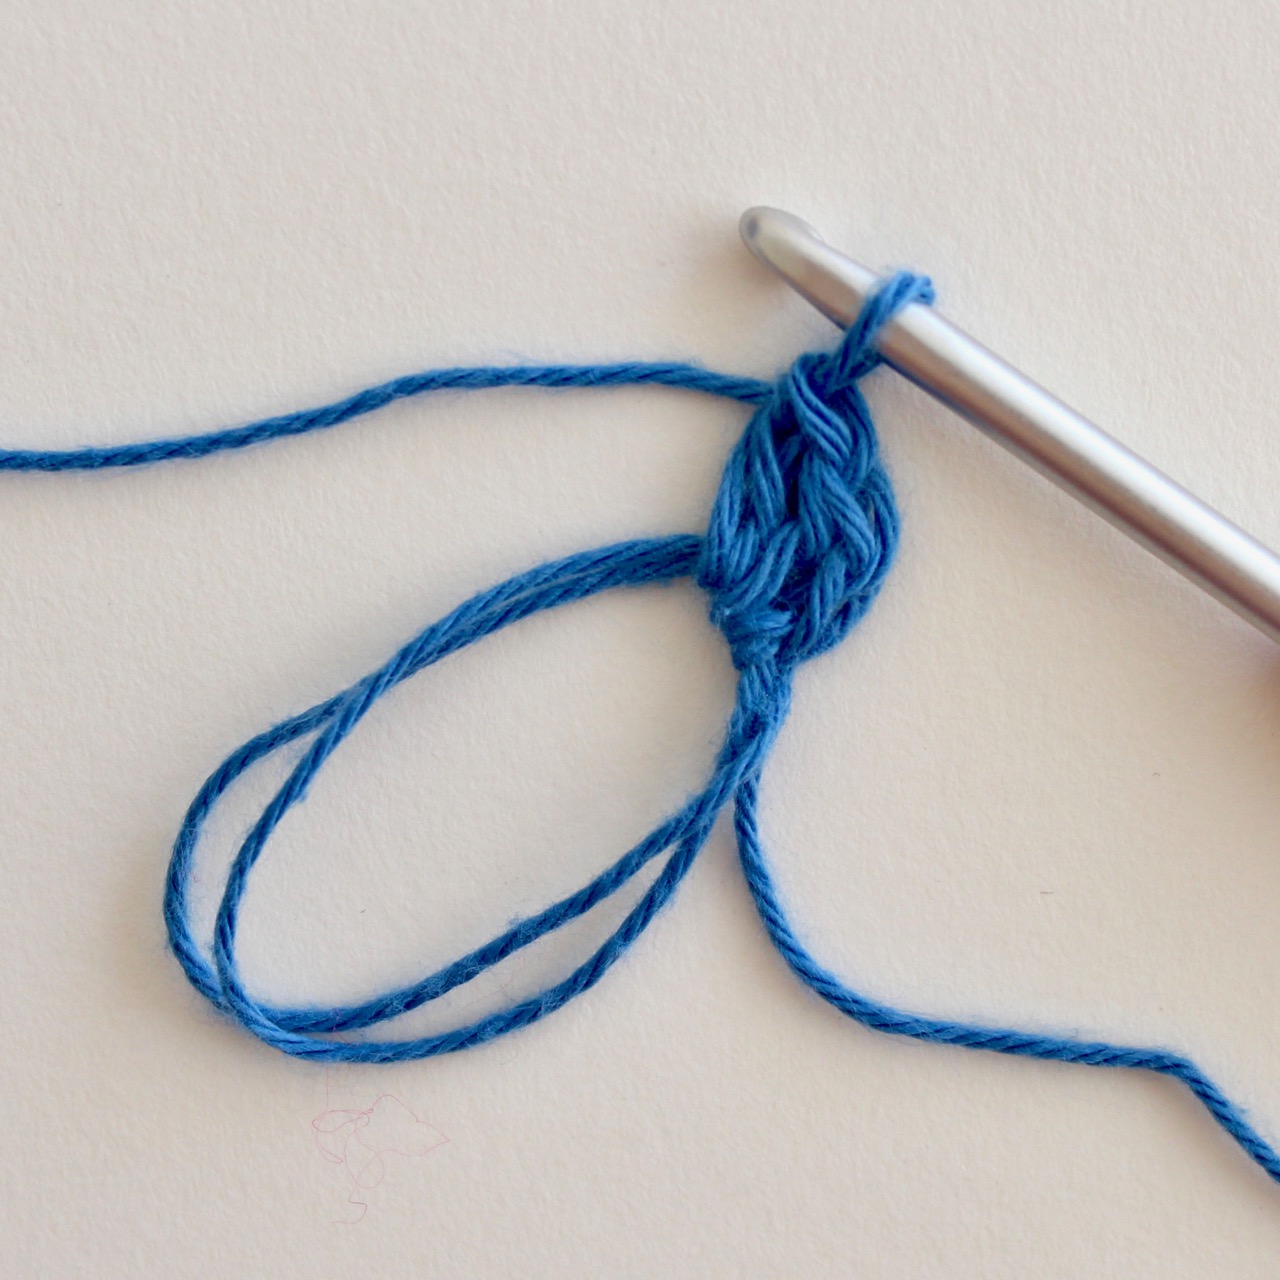
All the stitches of your first round will go into the 2 loops of the DMC. Here you can see the first 2 stitches worked into the 2 loops. The working yarn is on the left and tail is on the right. 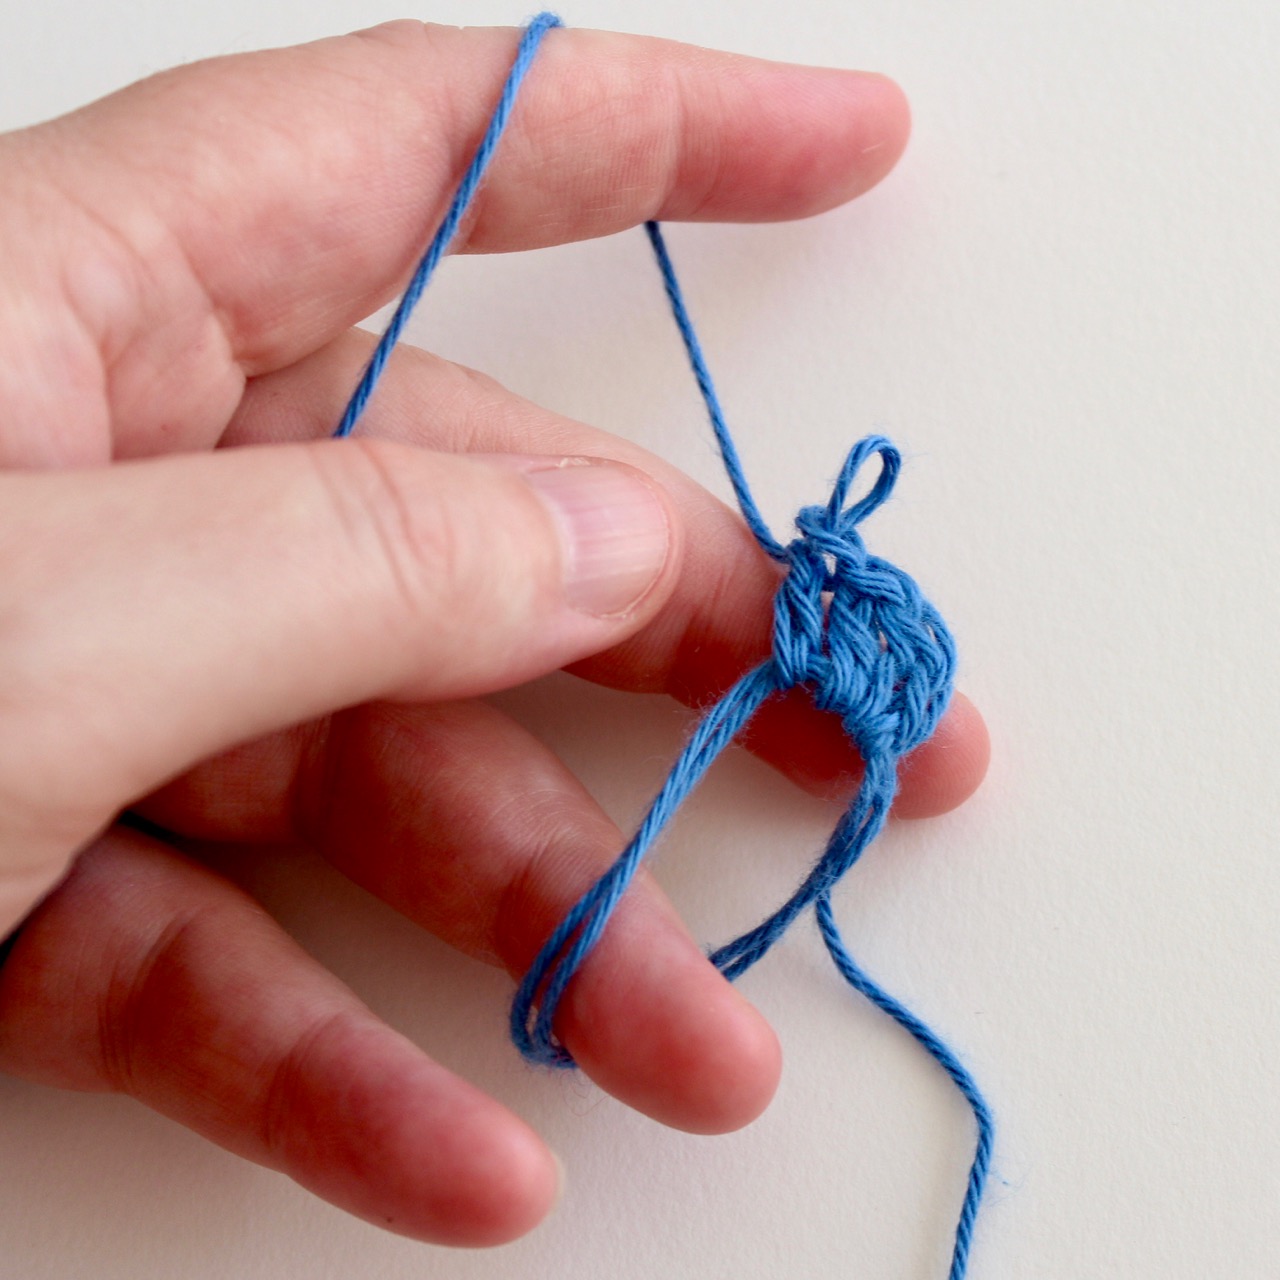
This shows how I hold the DMC whilst working. I have my working yarn tensioned over my index finger and I use my ring finger in the DMC to hold it tight. 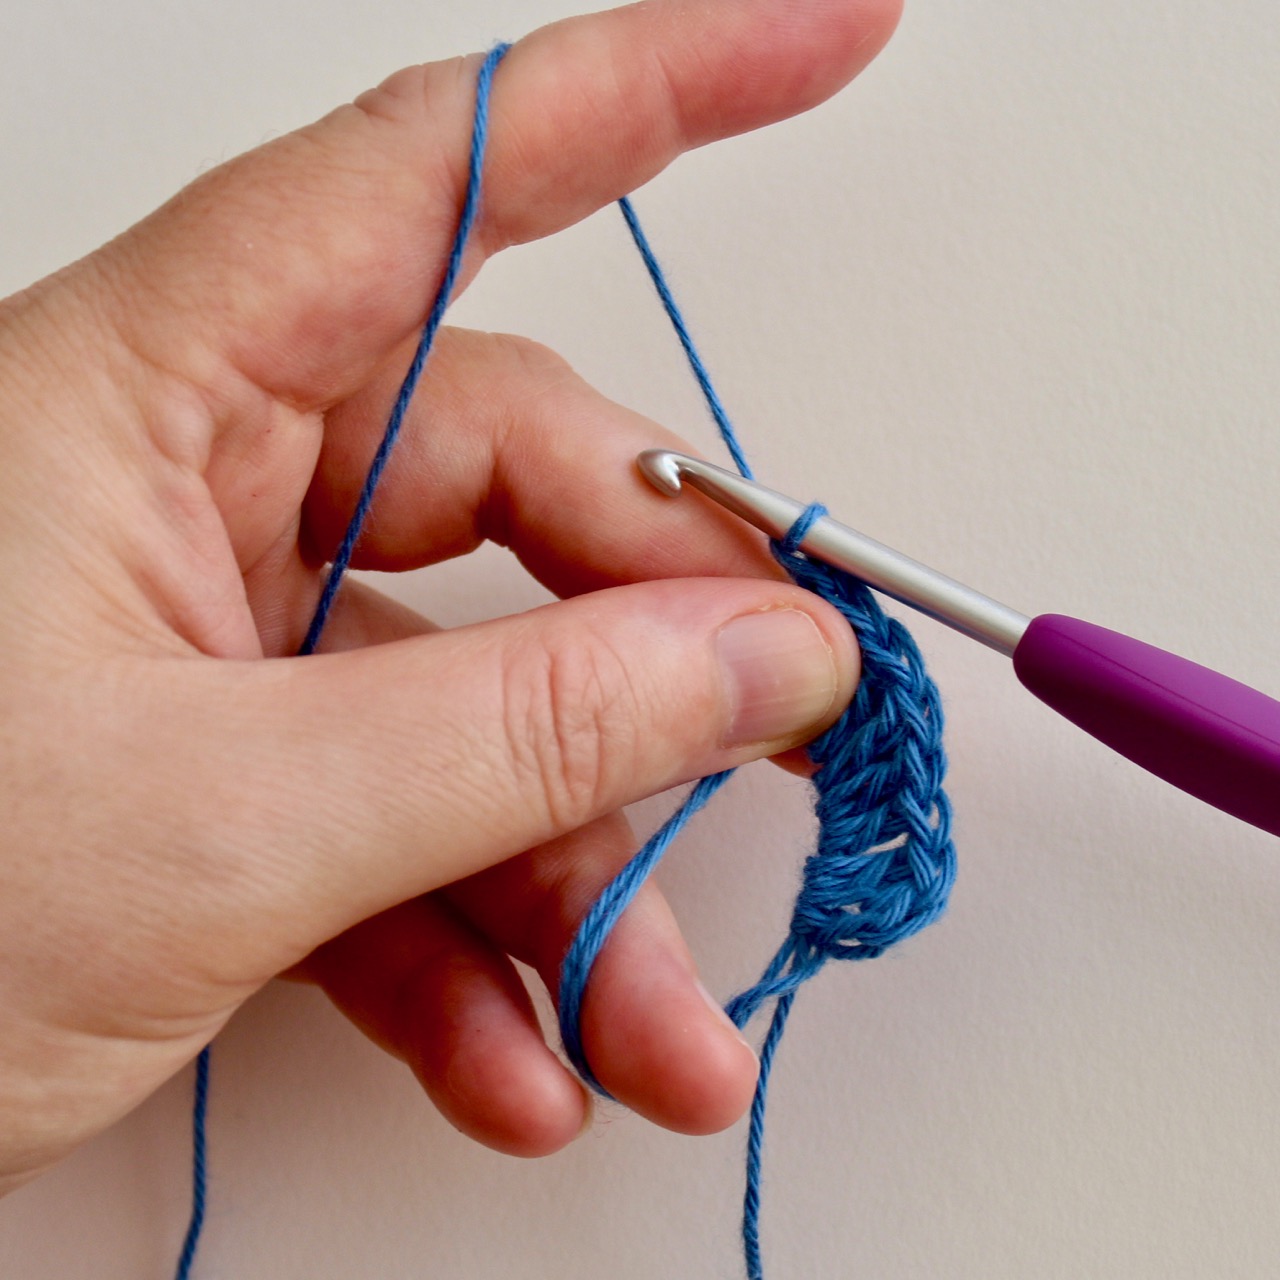
This leaves my middle finger and thumb to hold and control the work as I add more stitches. This may feel a little awkward at first but play around until you find a method that works for you. 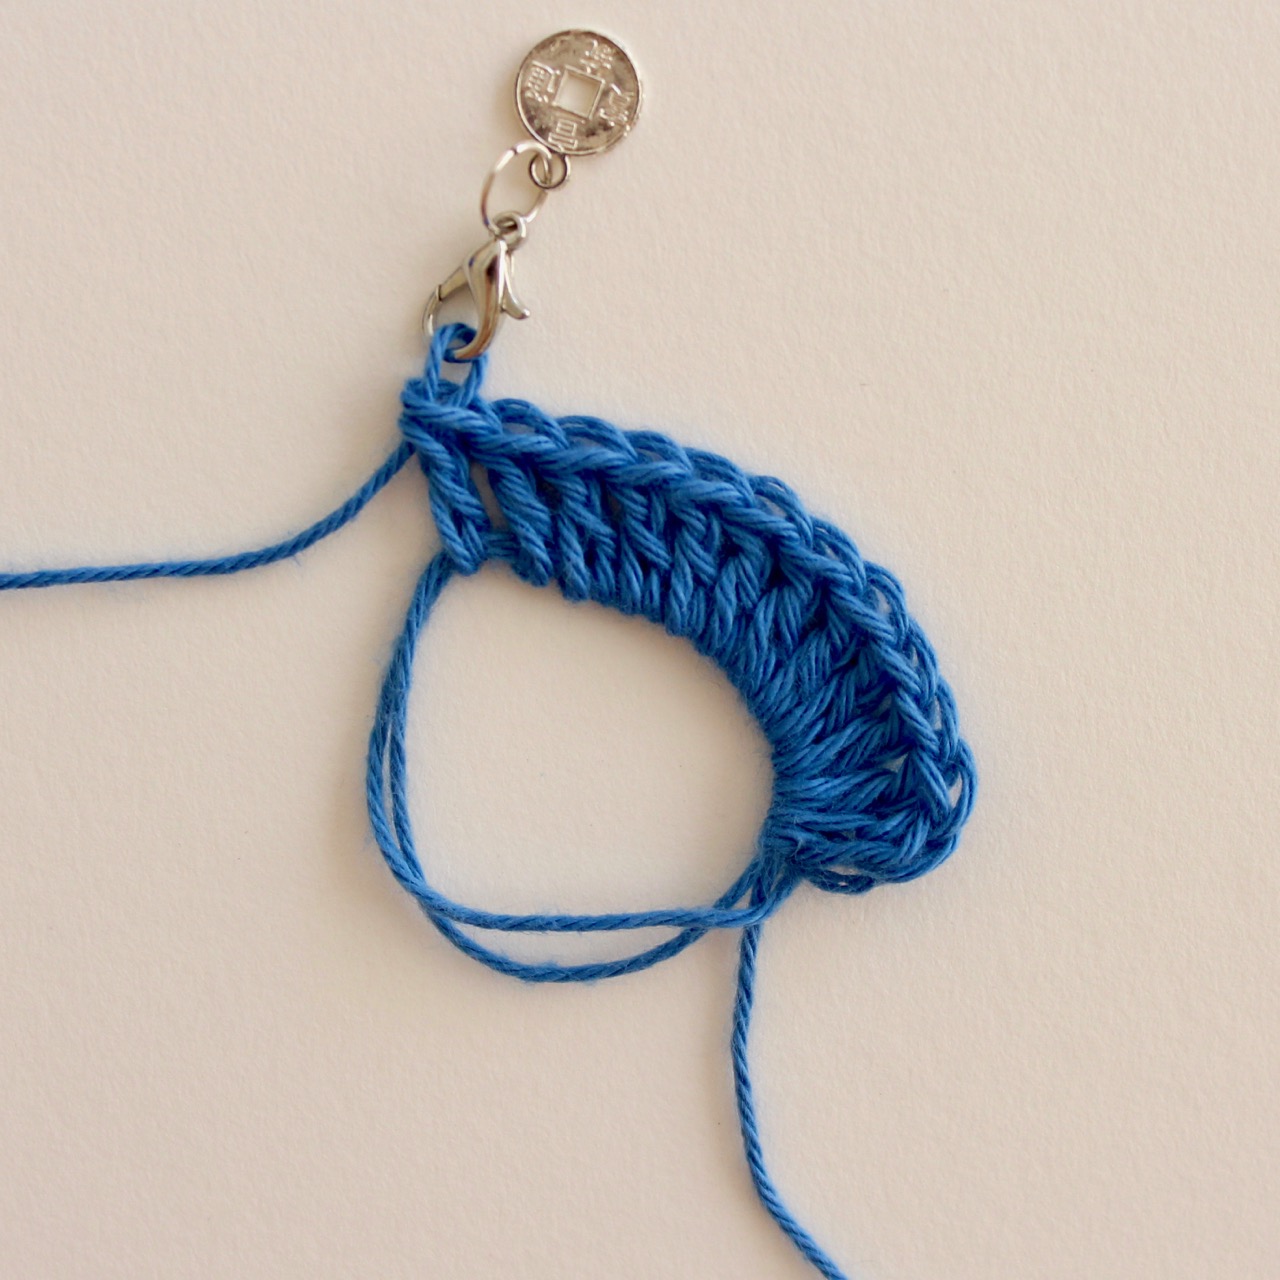
Here you can see all 12 stitches of the first round completed before tightening the DMC. - Tighten the DMC, making the hole any size you like or make the hole disappear completely.
Round 1 finished and ready to tighten the hole. You can make the hole whatever size you like – for this tutorial I will close the hole completely. 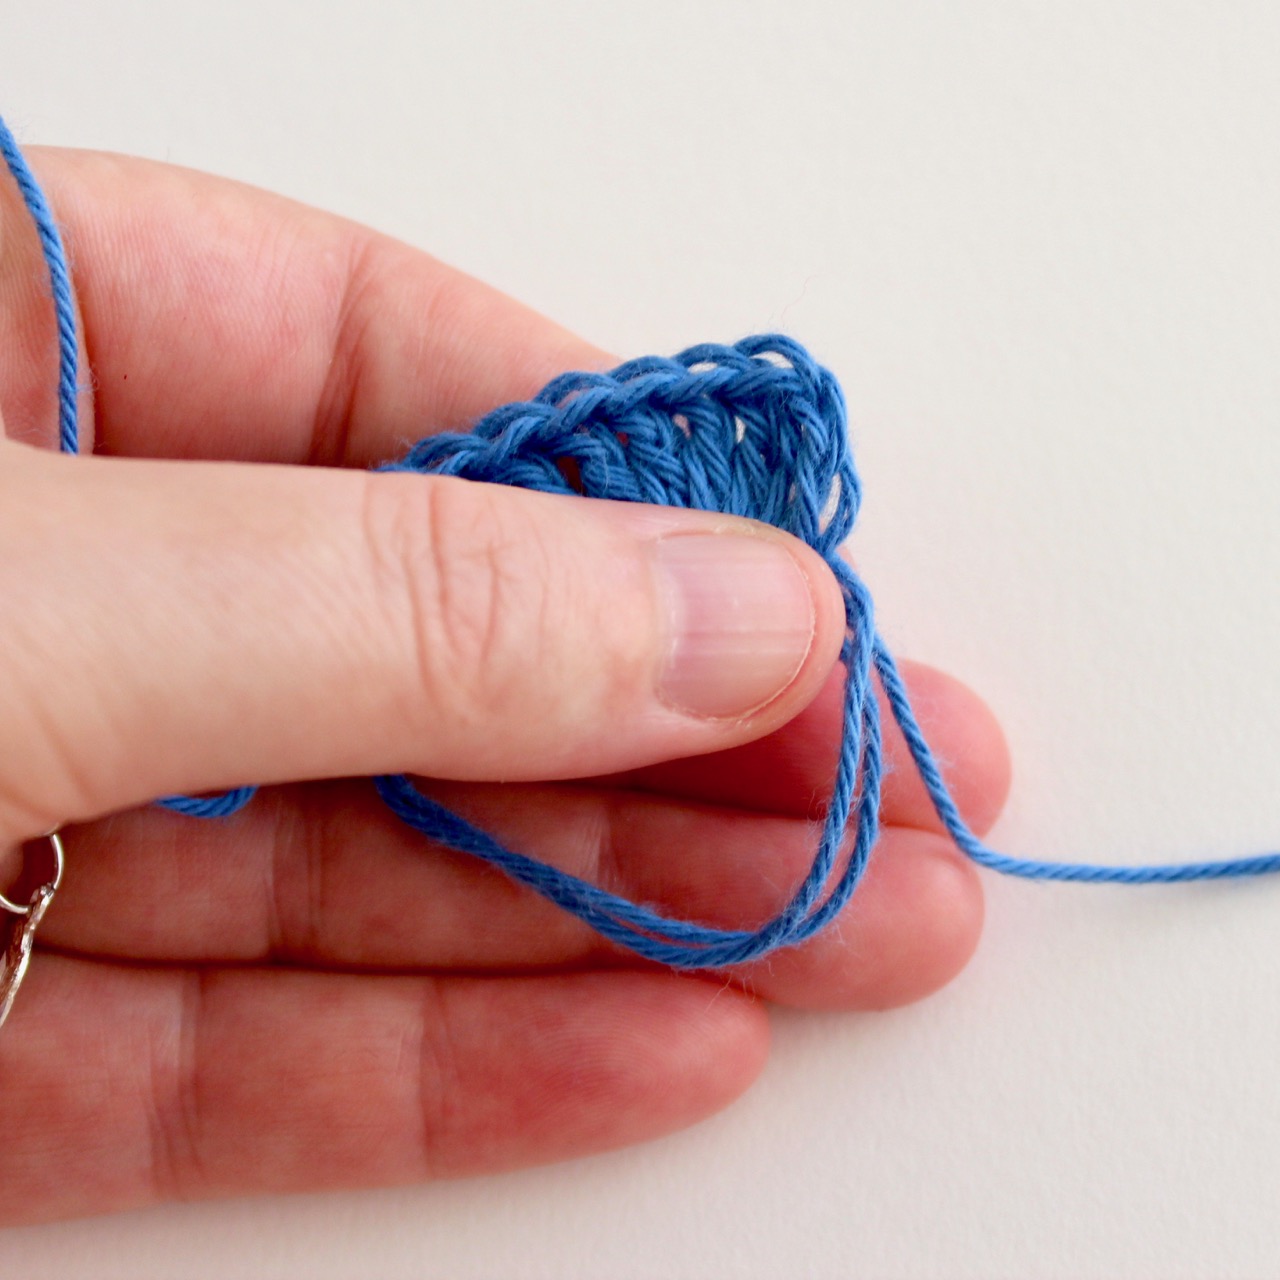
Using your thumb and index finger, hold the first stitch firmly at the base. 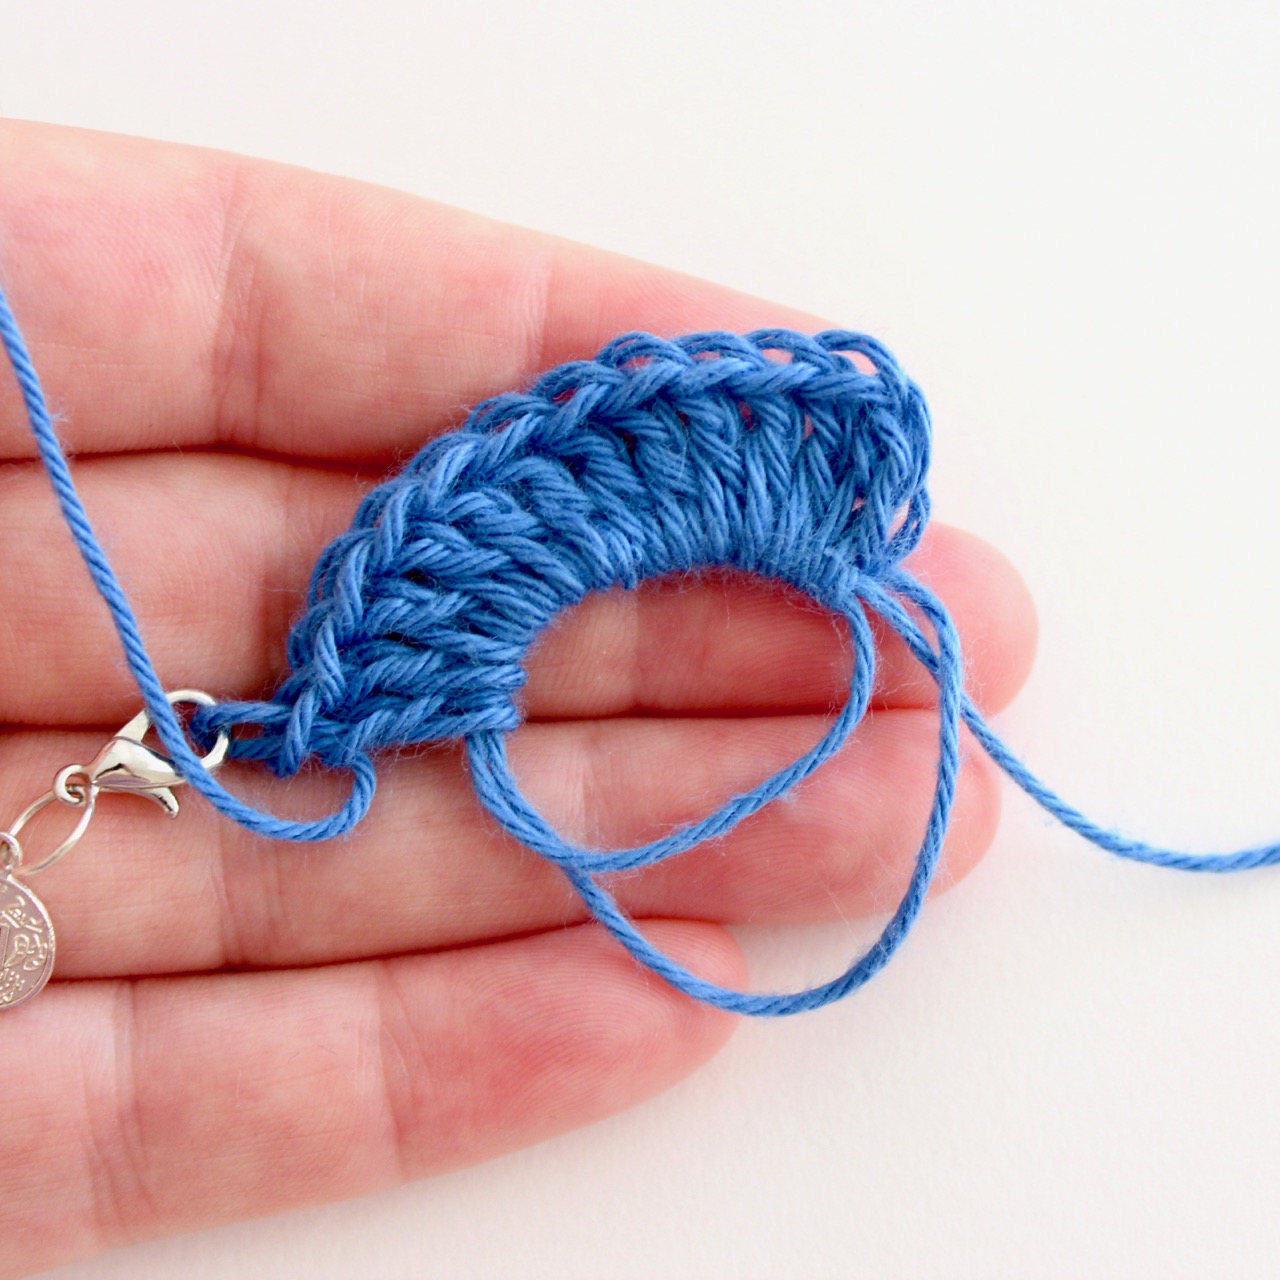
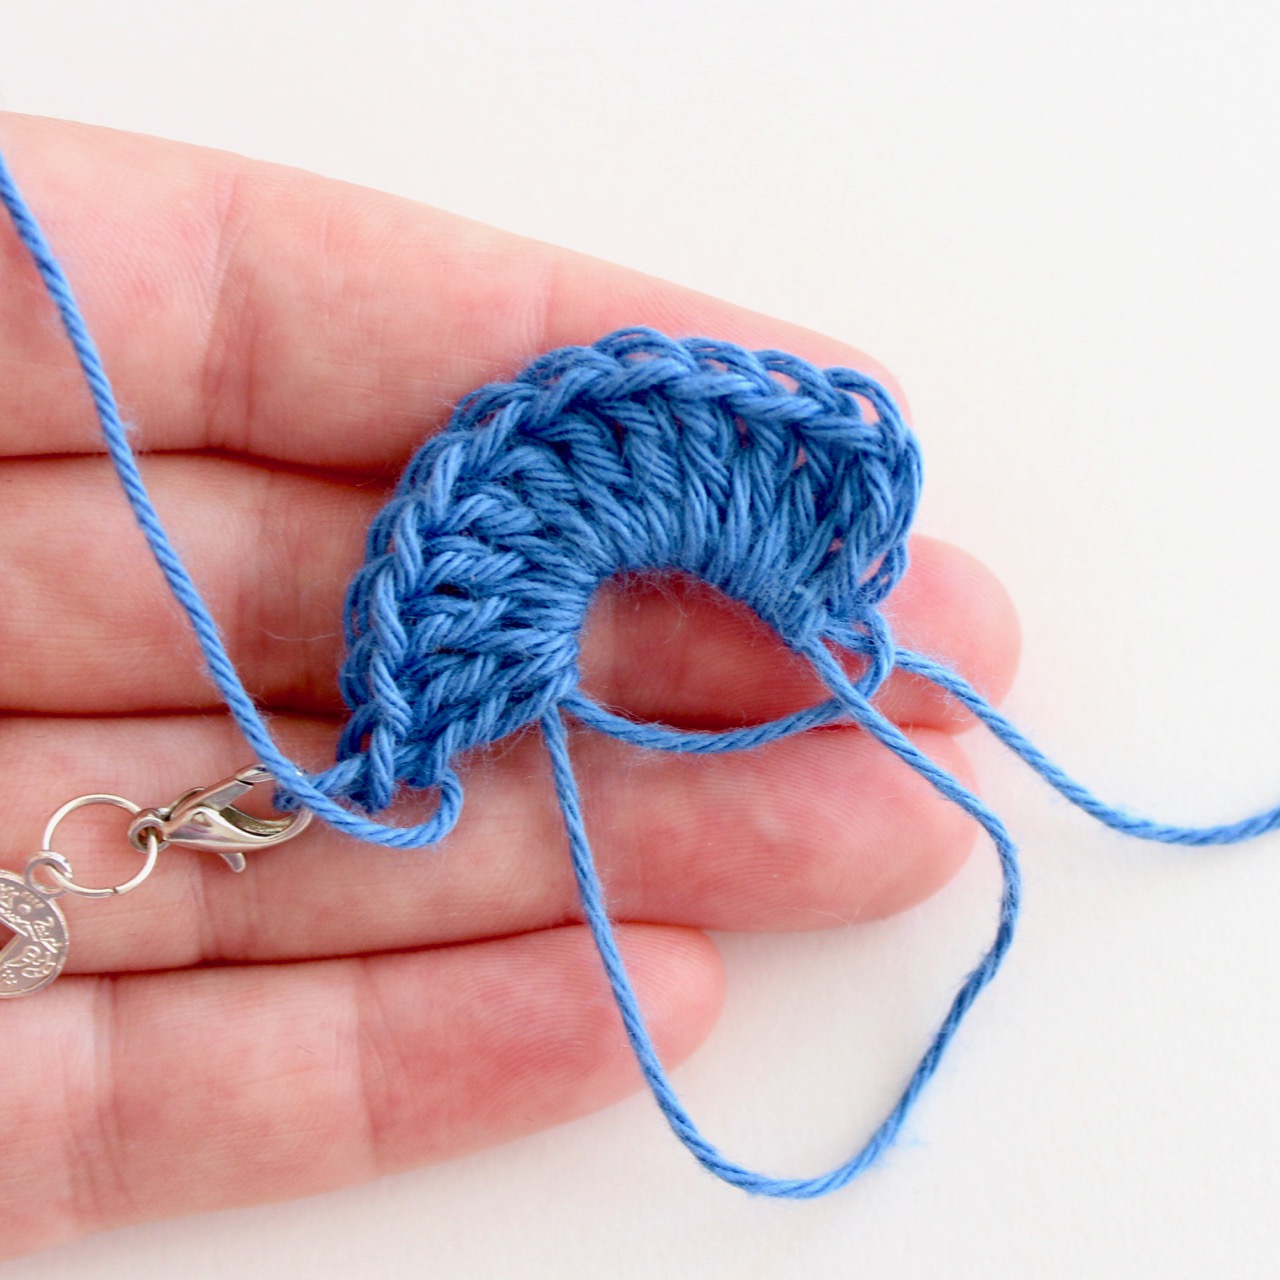
Drop the tail and gently pull the loop that you just saw get smaller. Pull this loop from near the first stitch. This will tighten the other loop. If your tail starts to move instead, you need to pull the loop in the other direction. 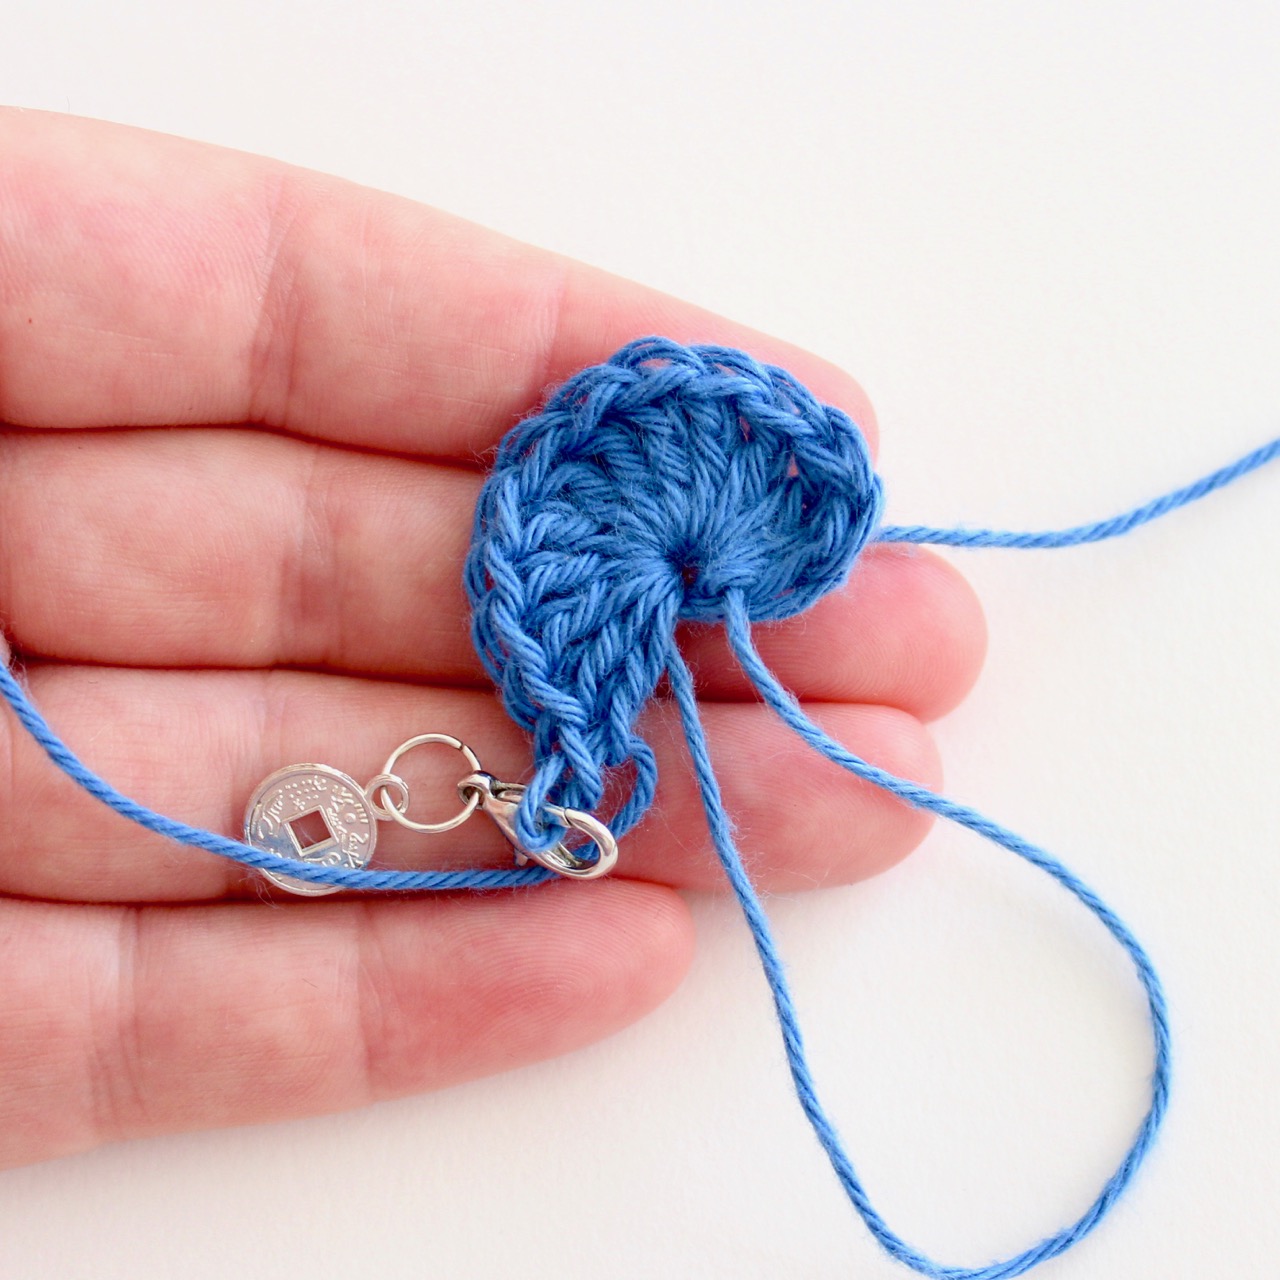
Here you can see that one of the loops has been completely tightened. Now grab your tail again, still holding your stitches with your thumb and index finger, and pull until the 2nd loop is completely closed. 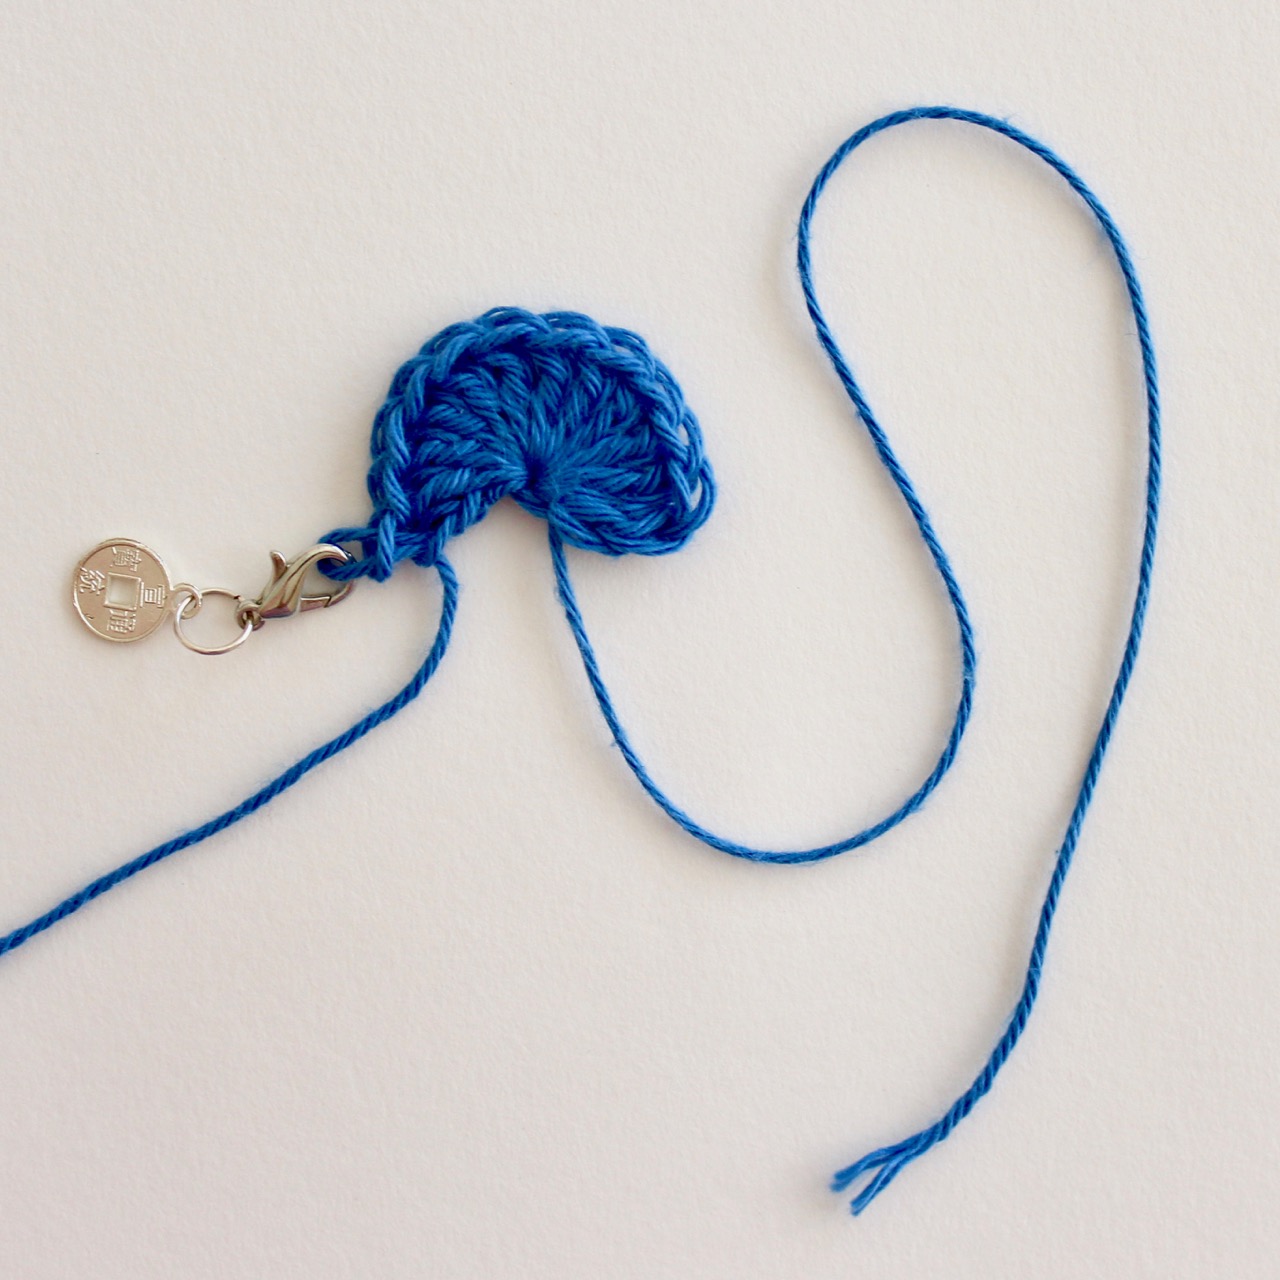
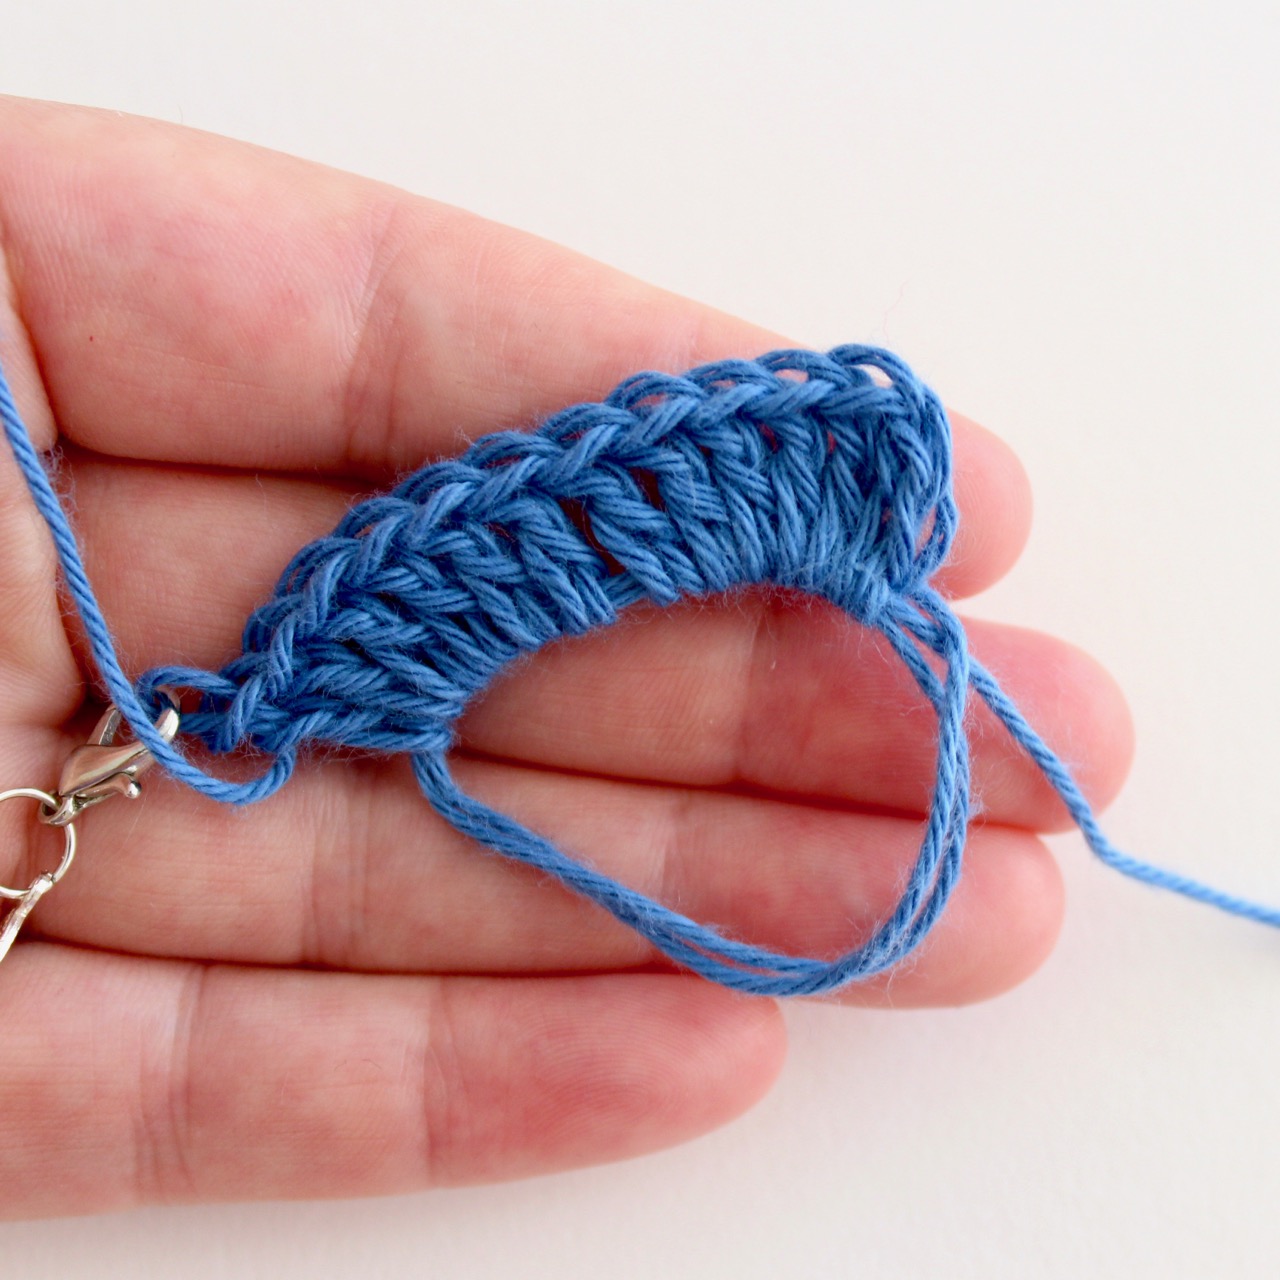
Both loops of the DMC are closed. You are now ready to finish the round. 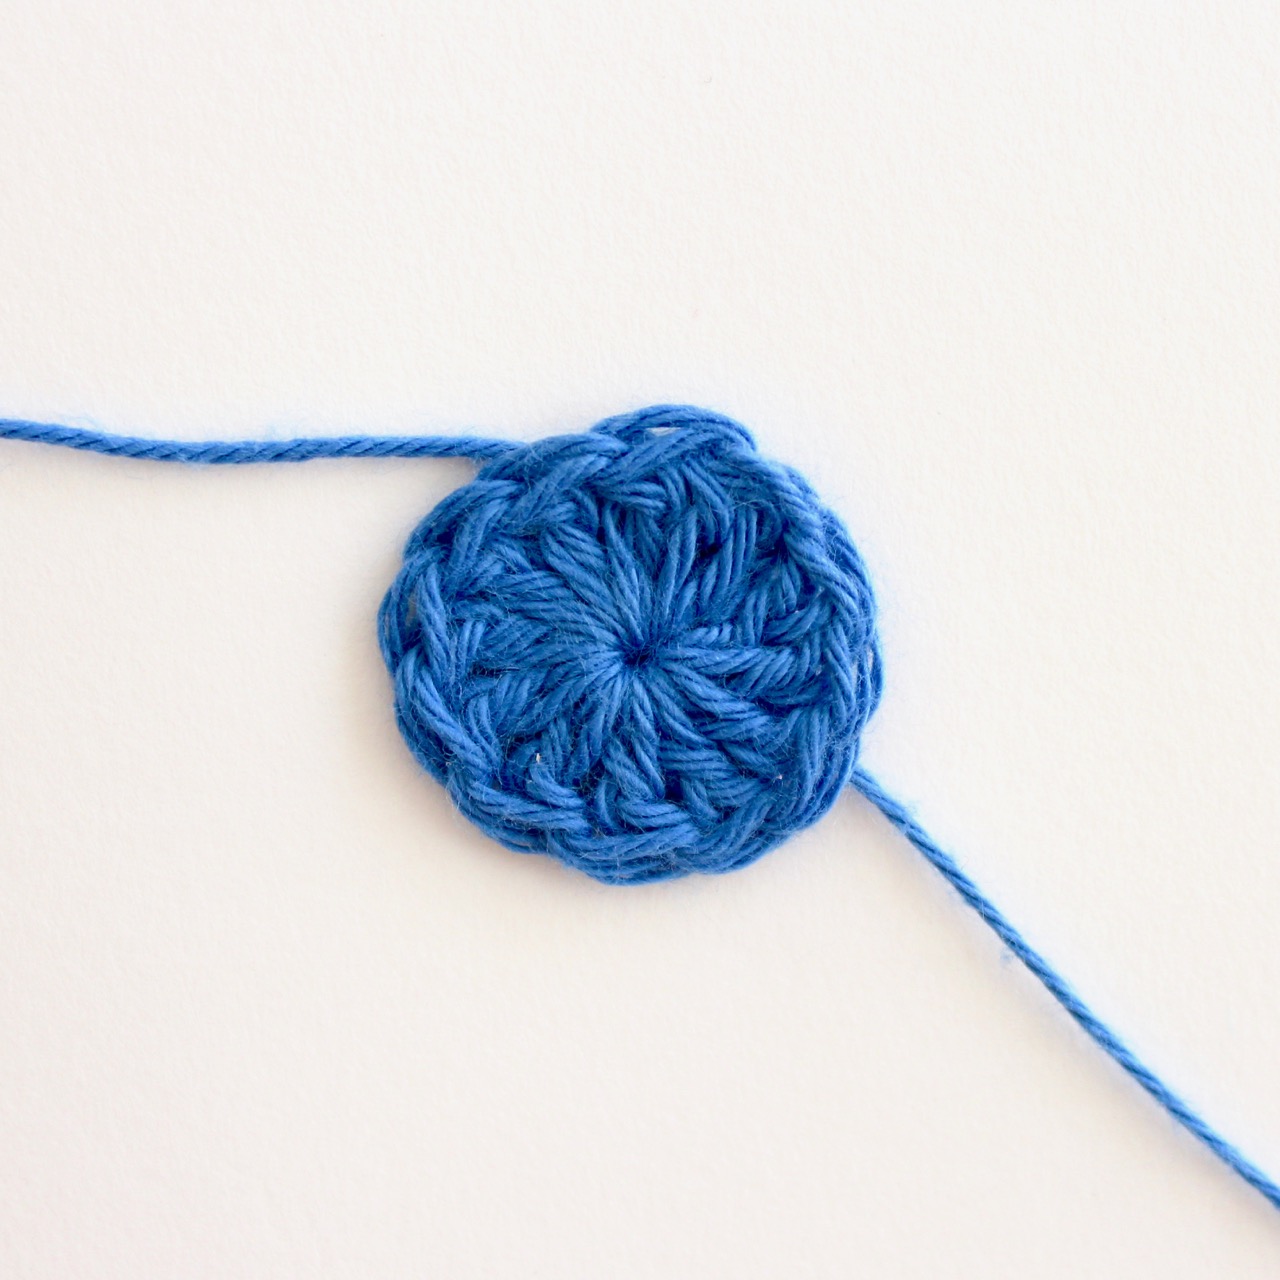
Put the hook back into your work and close the round with a slip stitch. I usually tighten the DMC a little bit after this by pulling the tail again.
Tutorial – Weaving in the end.
- To weave in your end you will work on the back side of your crochet.
Using a yarn needle begin the first repeat of the weaving pattern.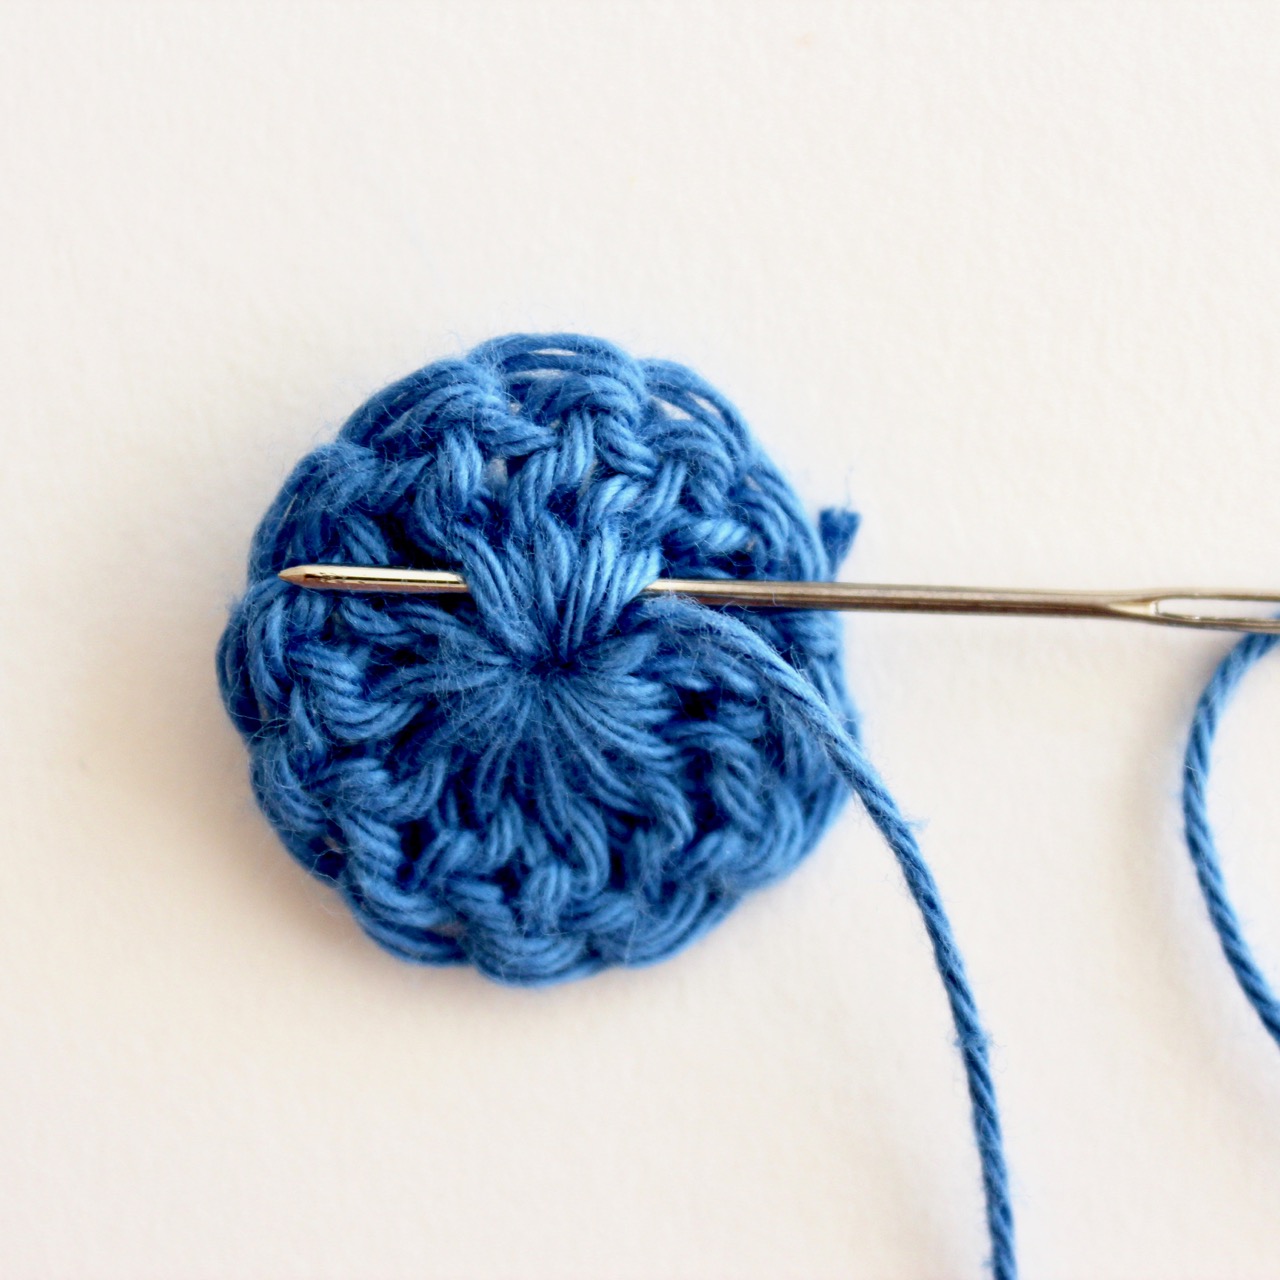
Thread yarn through needle. Insert needle through the base of a few stitches, continuing in the direction of the DMC (to the left or anti-clockwise). Come up in the middle of a stitch if you can. 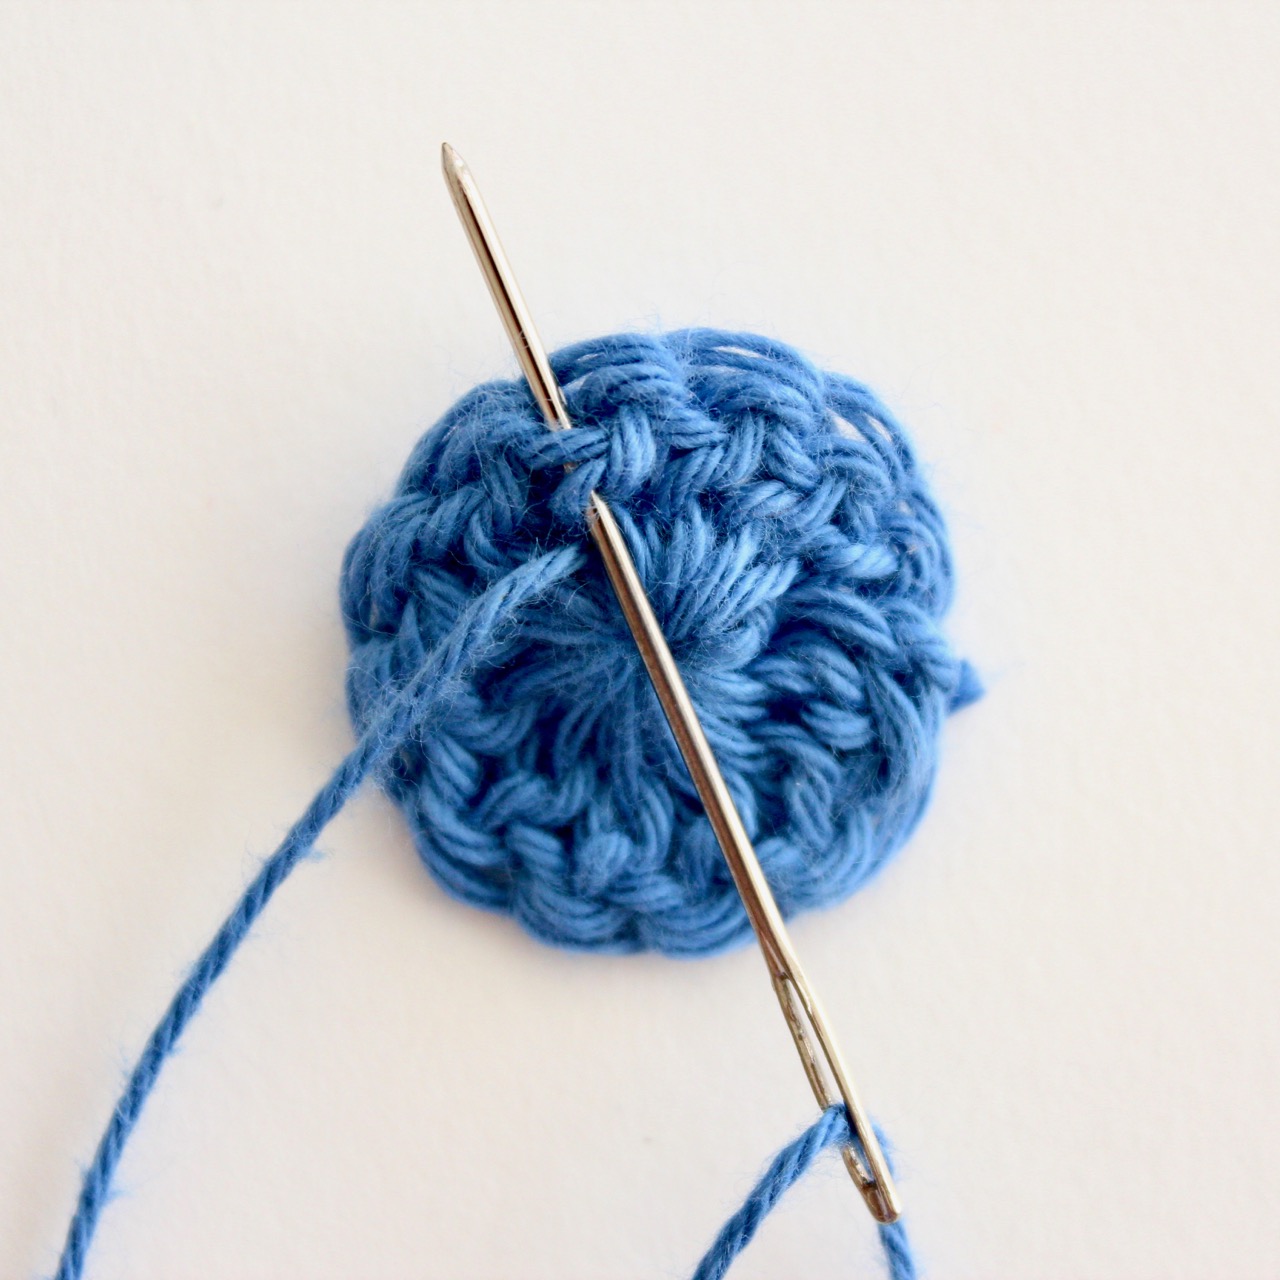
The next step is to go up the stitch. Here you can see that I’ve inserted my needle under the 2 sideways V loops on the back of my double crochet. Pull yarn through. 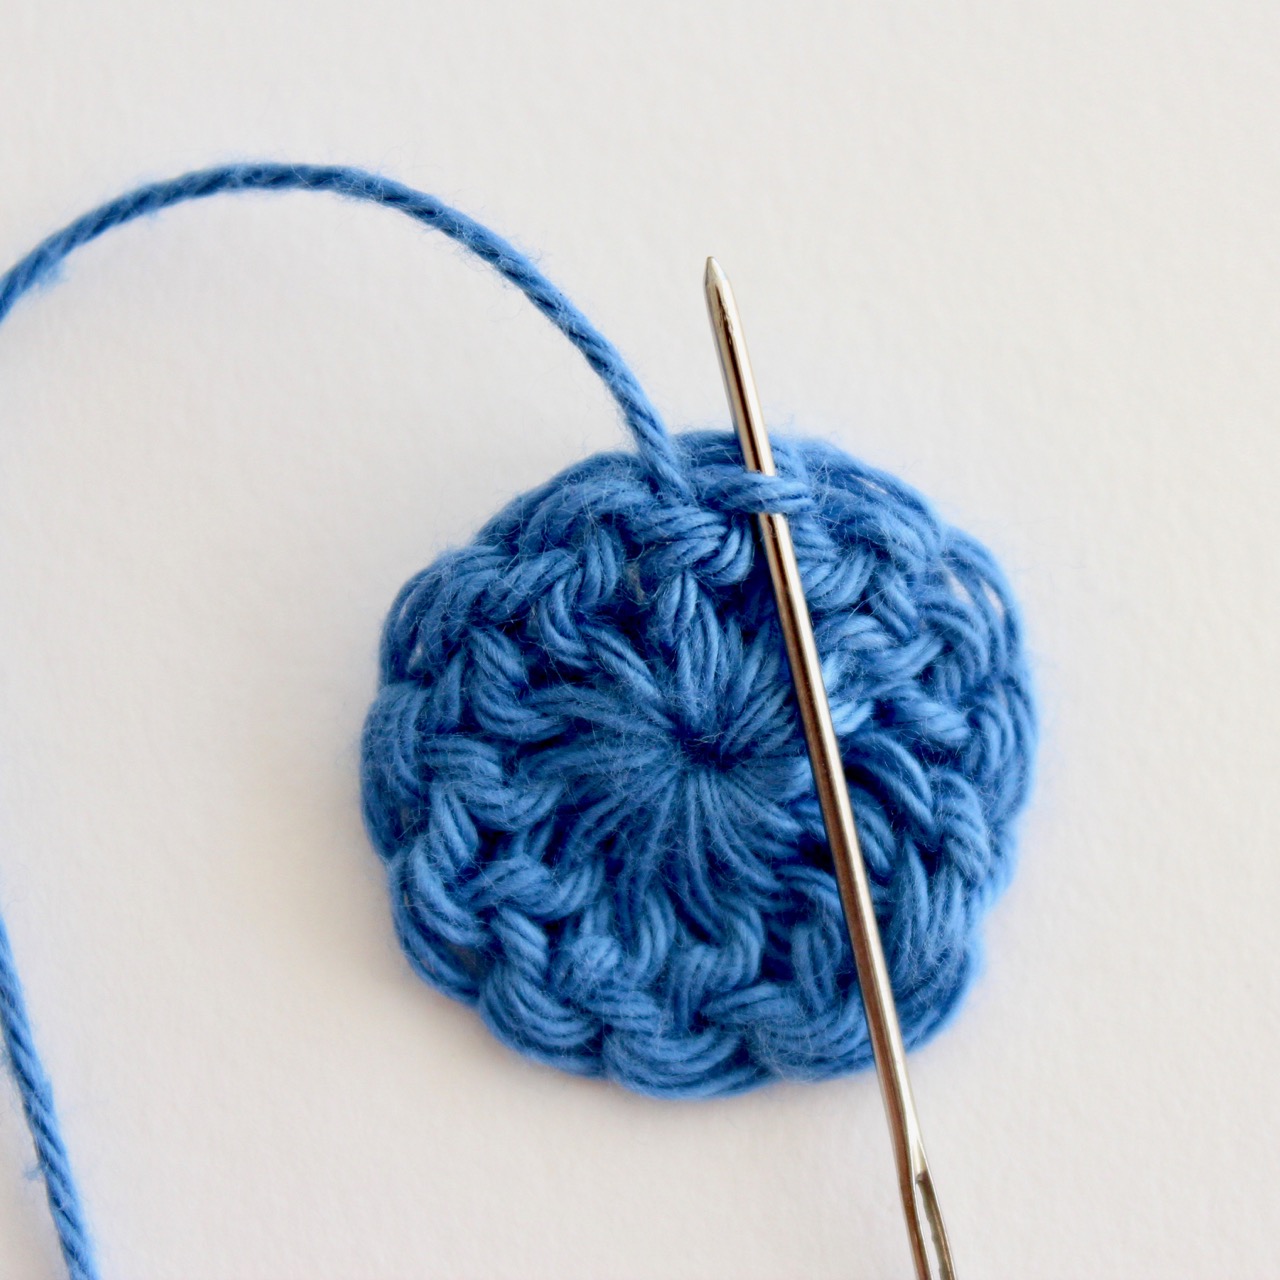
To go a bit further up I have put my needle through the 3rd loop of the stitch (the next horizontal bar up). Pull yarn through. 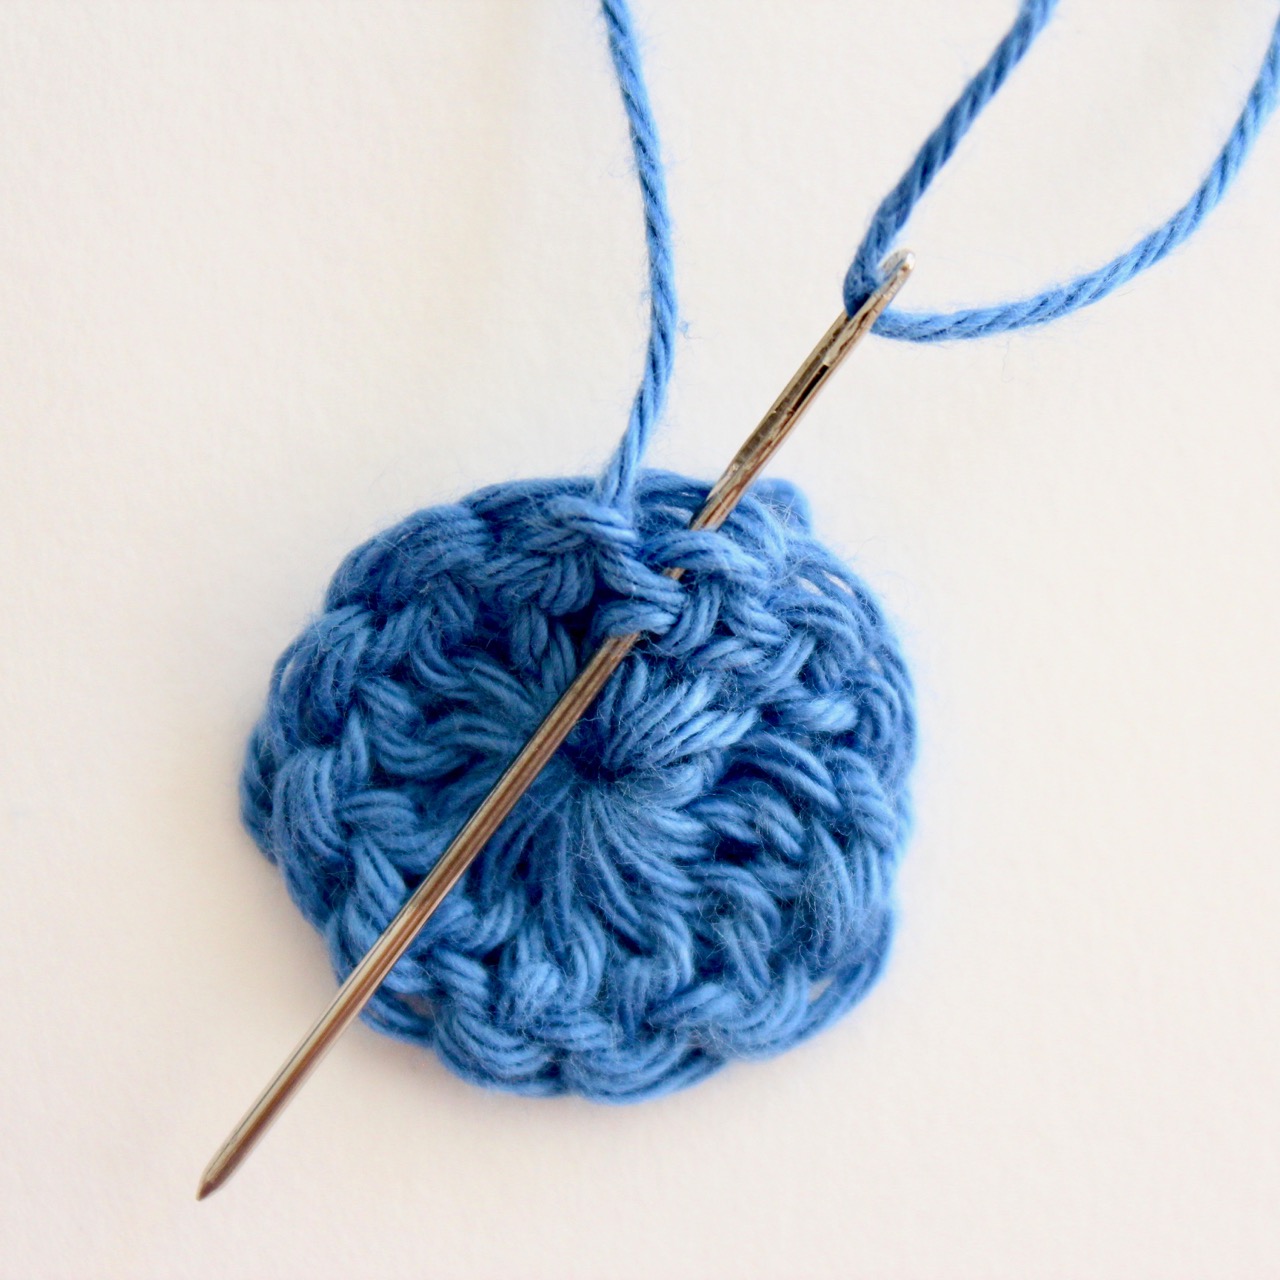
Go across the the right one stitch and go back down the stitch. My needle is going down through the same 3 loops I just went up. This brings you back to the centre of the round. - Repeat the weaving pattern 2 more times.
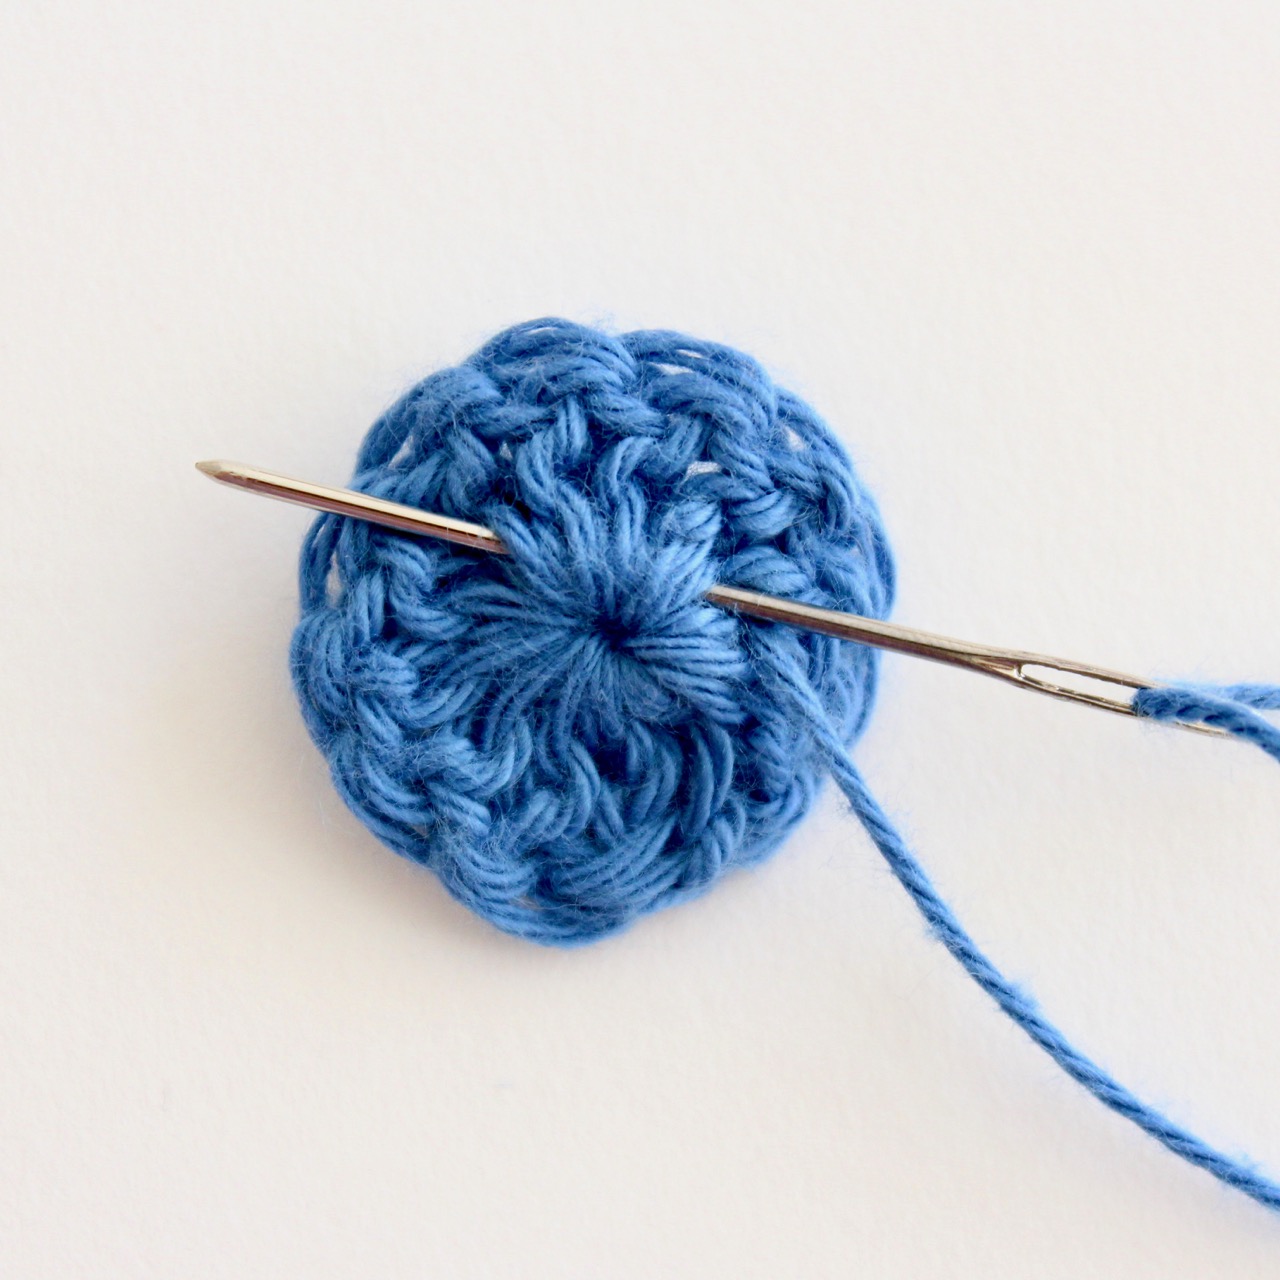
Insert your needle under the base of the stitches and go left a few stitches coming up in the middle of a stitch again. 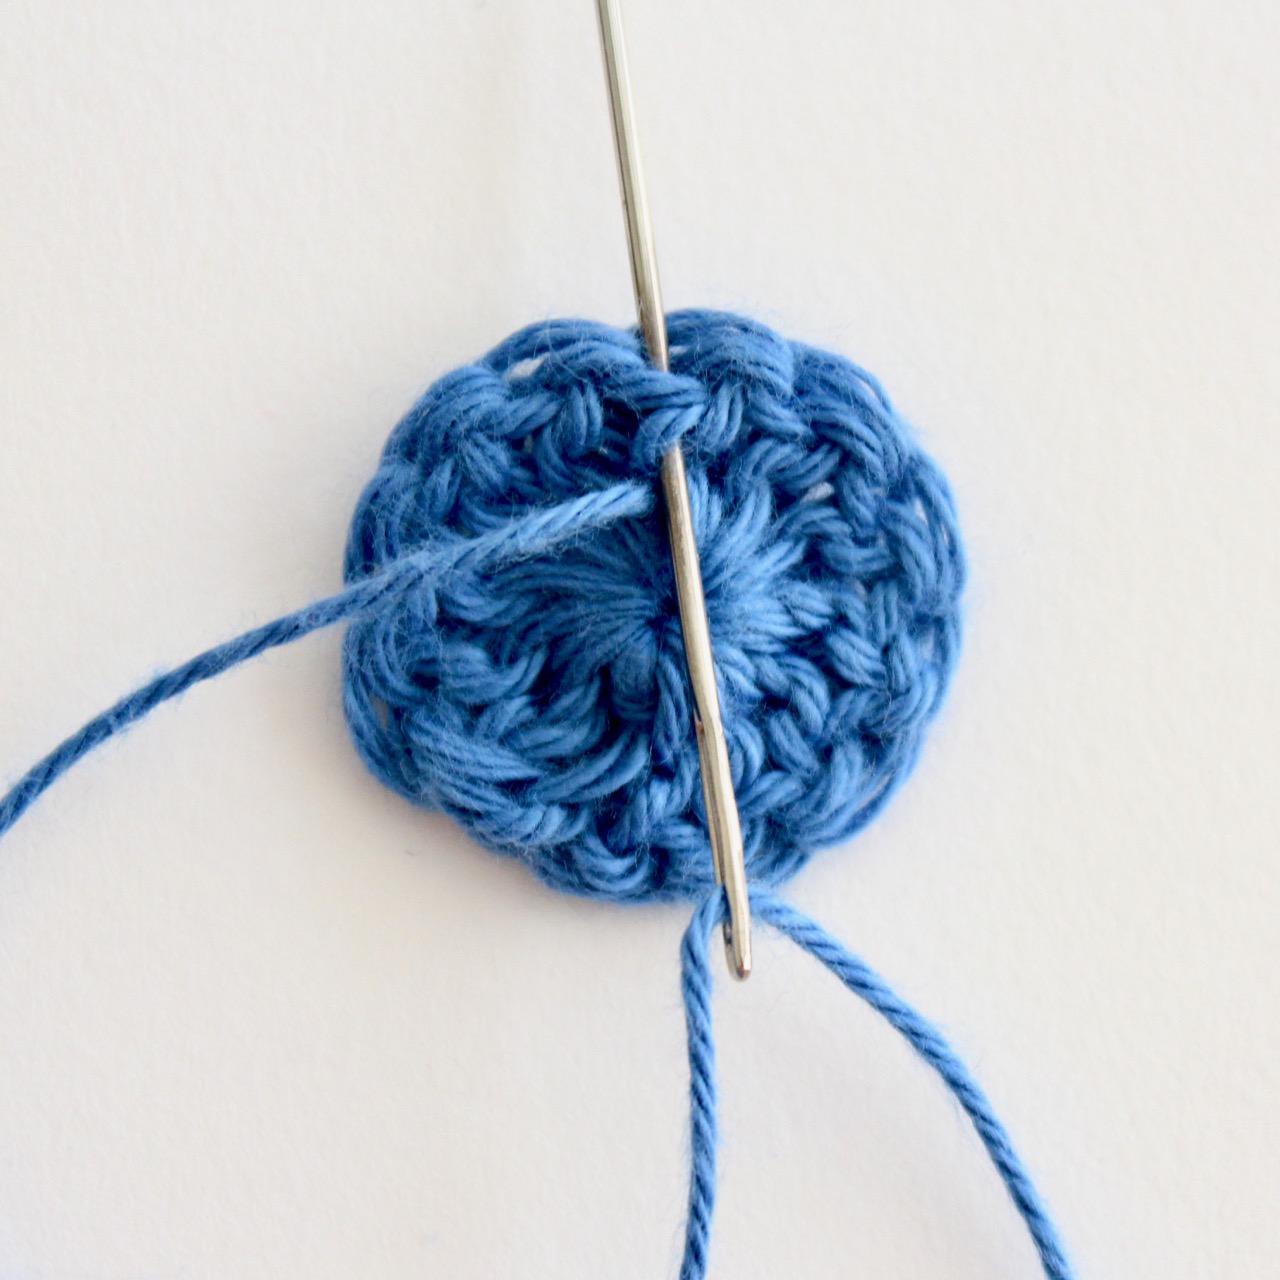
Go up the stitch by inserting your needle under those horizontal bars. Go right one stitch and back down again. Repeat. - Finish weaving in by going around under the stitches in the centre of the round one more time and cut your yarn.
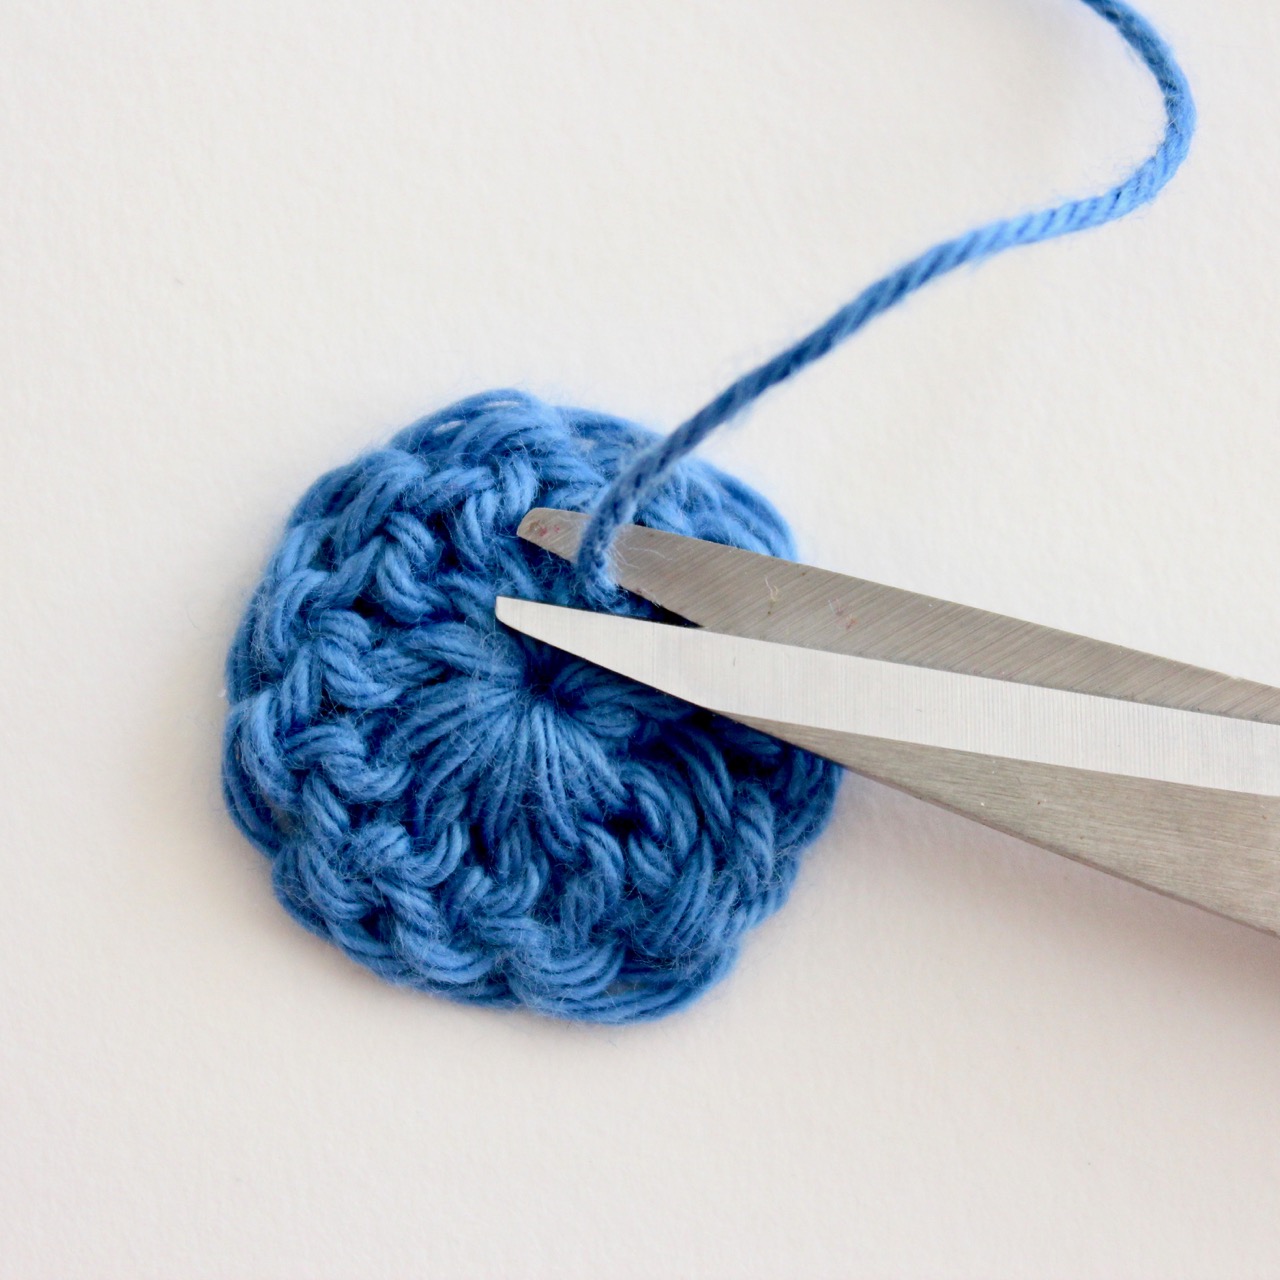
After weaving around under the stitches in the centre one more time you can cut your yarn. 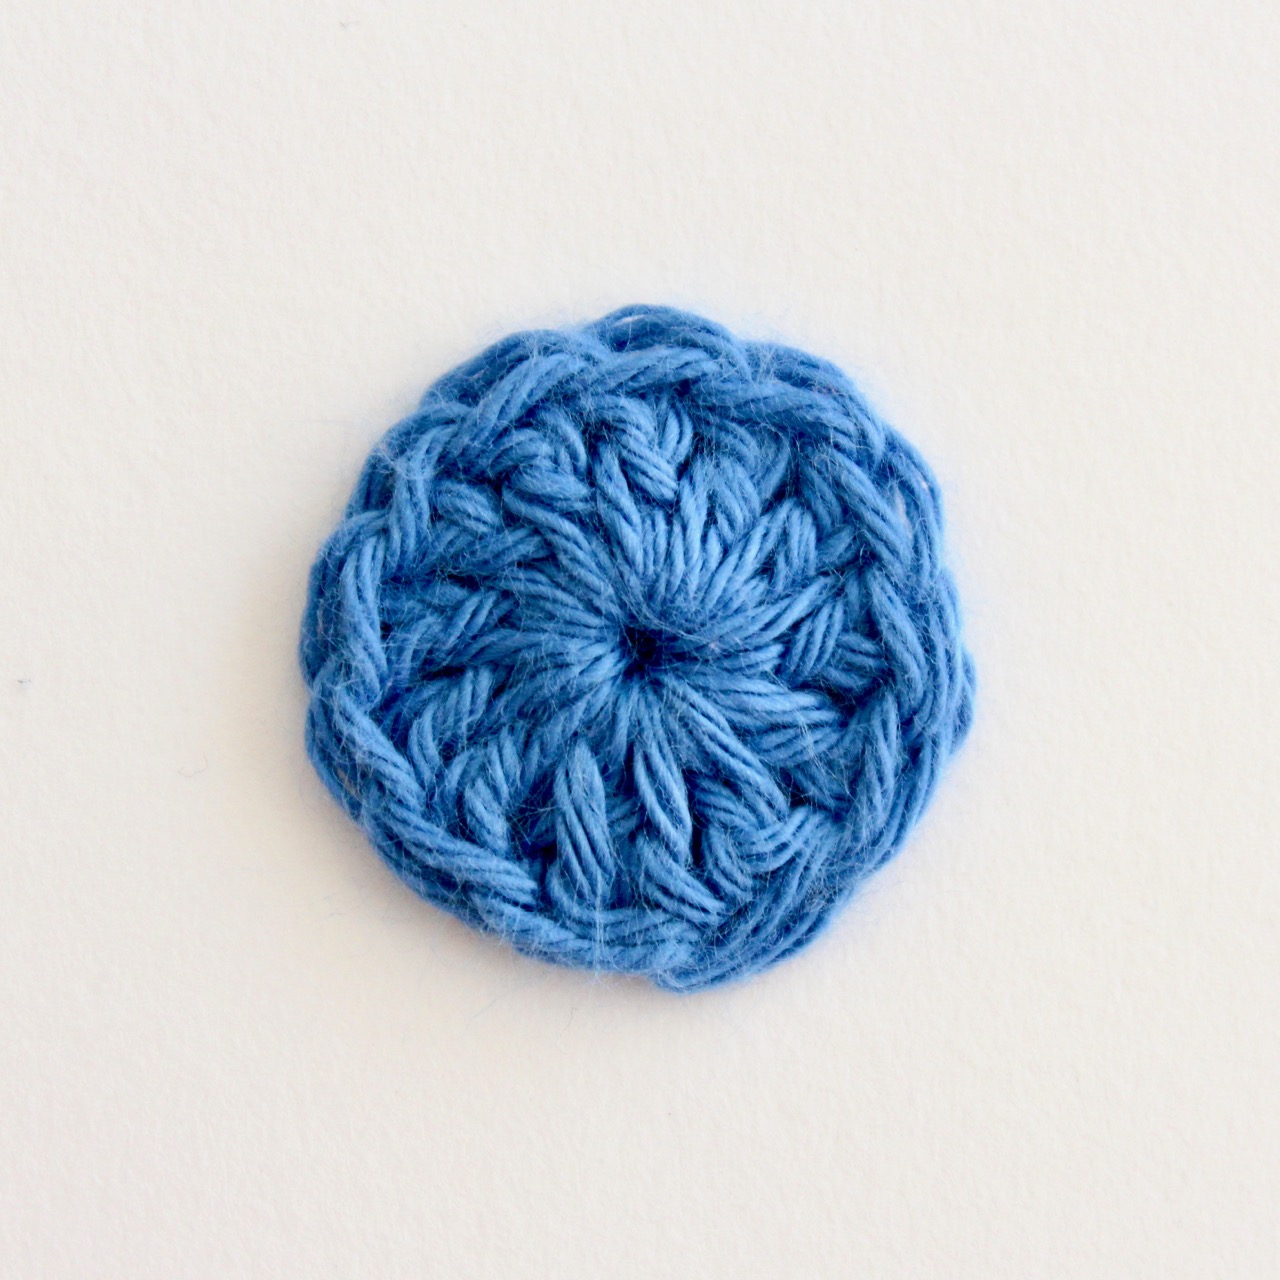
Here you can see the the front of the finished round with the end woven in. As I inserted the needle under those horizontal bars on the back of the stitch you can’t see anything from the front. 
This is the back of the finished first round with the end woven in. You may be able to spot where you went up the stitches if you look closely but they are hidden pretty well. - Chart. Follow the arrows starting at the open circle. This is where the long tail from tightening the DMC is.

Weave yarn under the stitches in the centre to the left at least 2 stitches.
[ Weave yarn up the middle of the stitch.
Take yarn across to the next stitch to the right then weave yarn down the middle of that stitch.
Weave yarn under the stitches in the centre to the left 3 or 4 stitches. ]
Repeat instructions in brackets [ ] 2 more times.
This brings you back to where you started.
Weave yarn under the stitches in the centre in a full circle. Cut yarn.
The reasons that this style of weaving in works.
- You change direction multiple times looping over itself which means that the yarn would have to be pulled in the right direction in the right order multiple times to come undone.
- You are likely to split the yarn with your needle a fews times which helps intertwine and lock the strands together adding to the security of your weaving.
So that’s it! The Double Magic Circle and how I weave the end in making it as secure as I can.
Do you use a magic circle? Do you love it as much as I do?!?
I hope you find this tutorial useful. Let me know what you think below.

I am trying to do crochet again after about 10 yrs. Good physical therapy for hands. This seems easy to follow. Making coasters. I hope.🪡🧶
Good luck with your coasters Diann and I hope this technique helps. Have fun xx