Happy Easter!
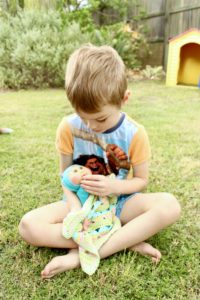
As a Mum, my favourite part of Easter (besides chocolate for breakfast) is the Easter Egg hunt with my son.
I love hiding the eggs and then watching the complete joy on his face every time he finds one! It's one of those moments of pure joy that simultaneously takes me back to childhood and makes me feels completely happy with my life in this moment.
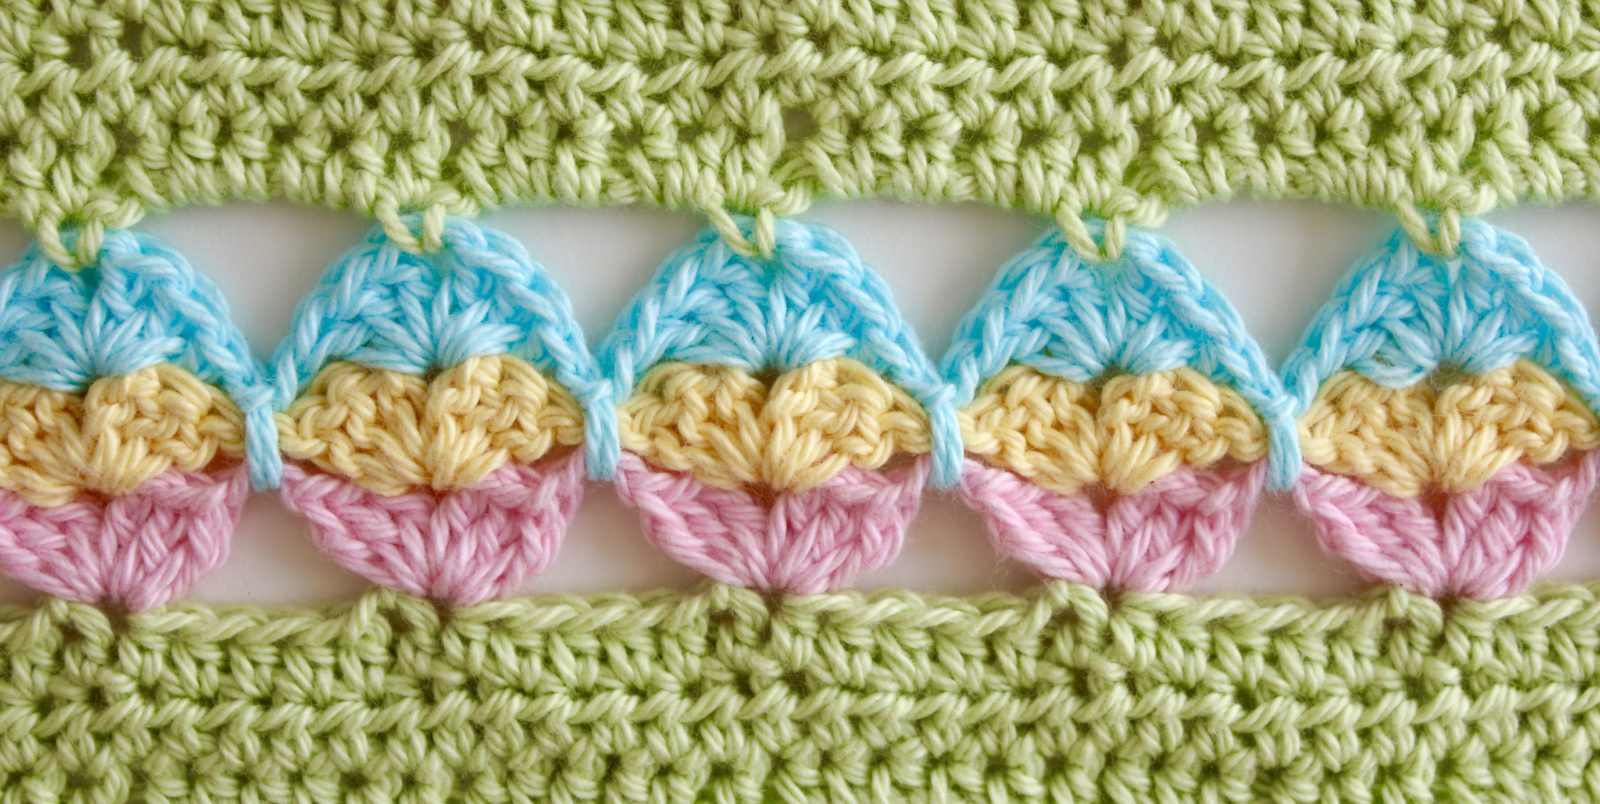
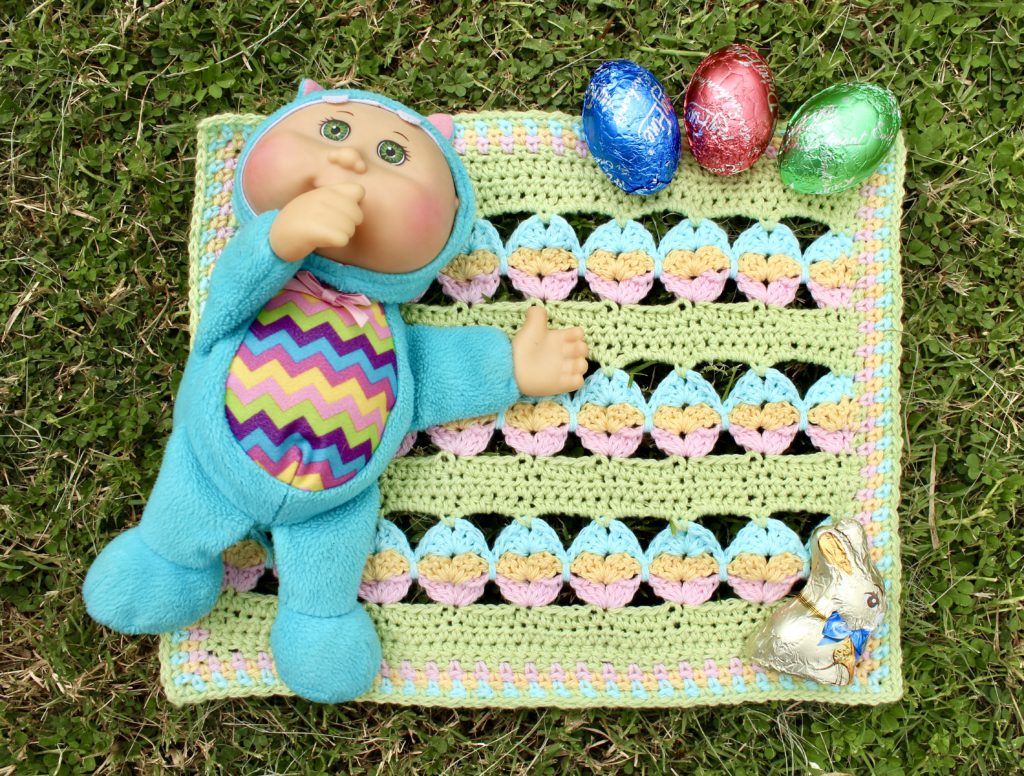
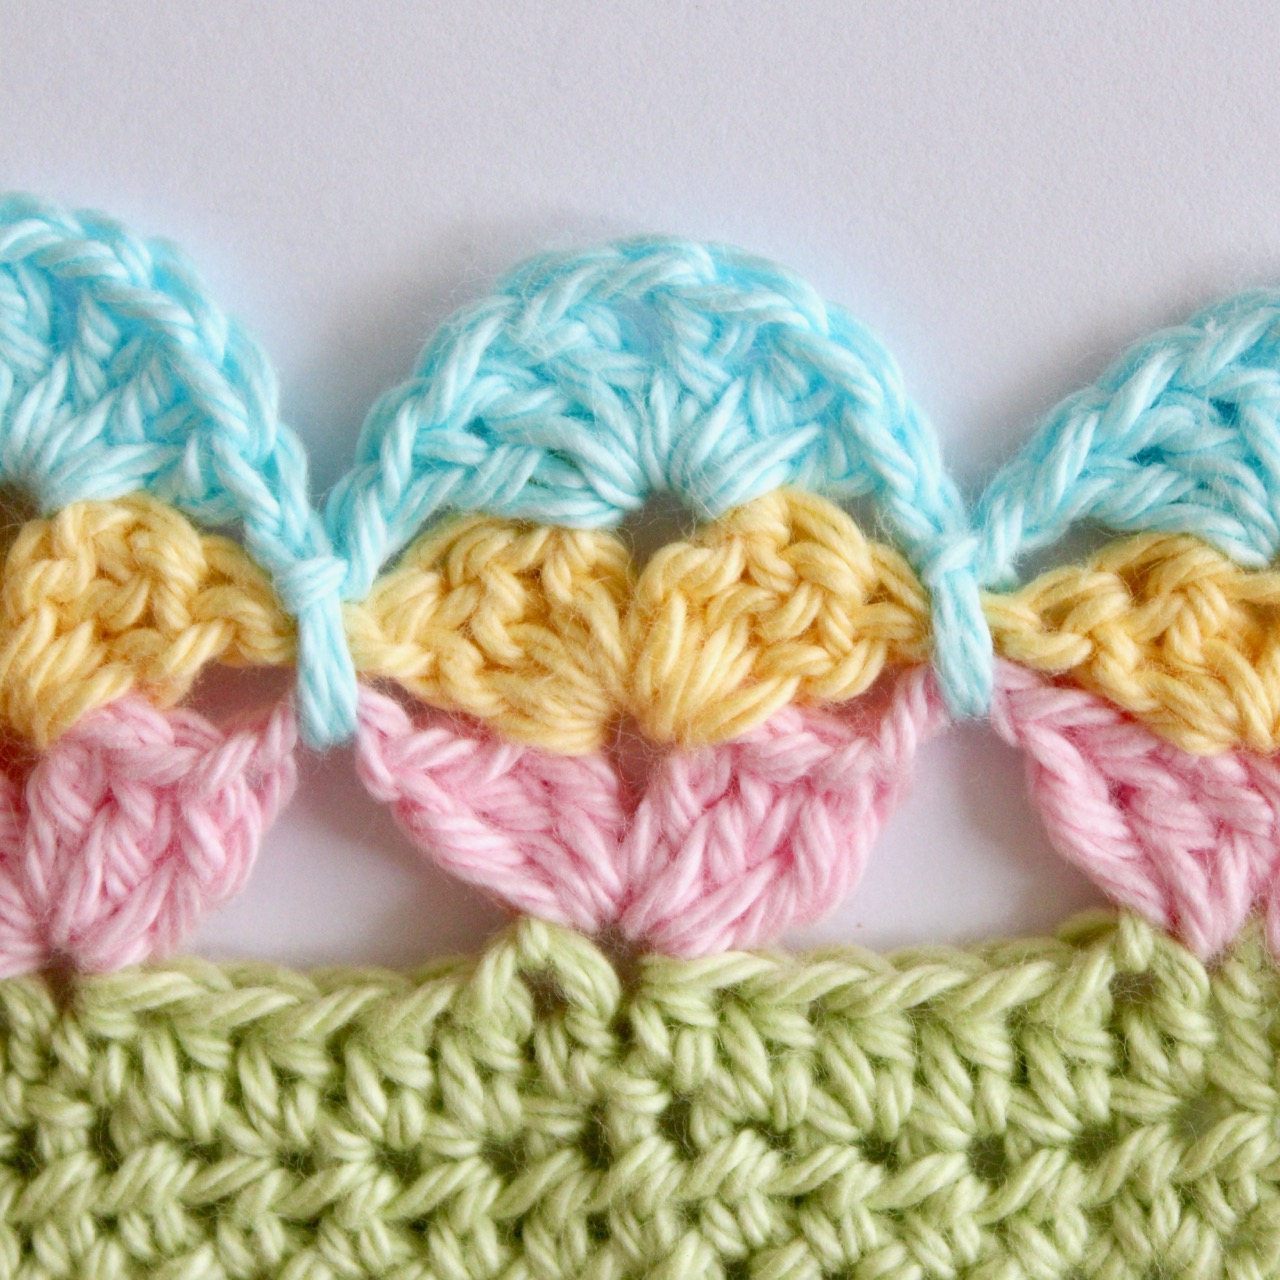
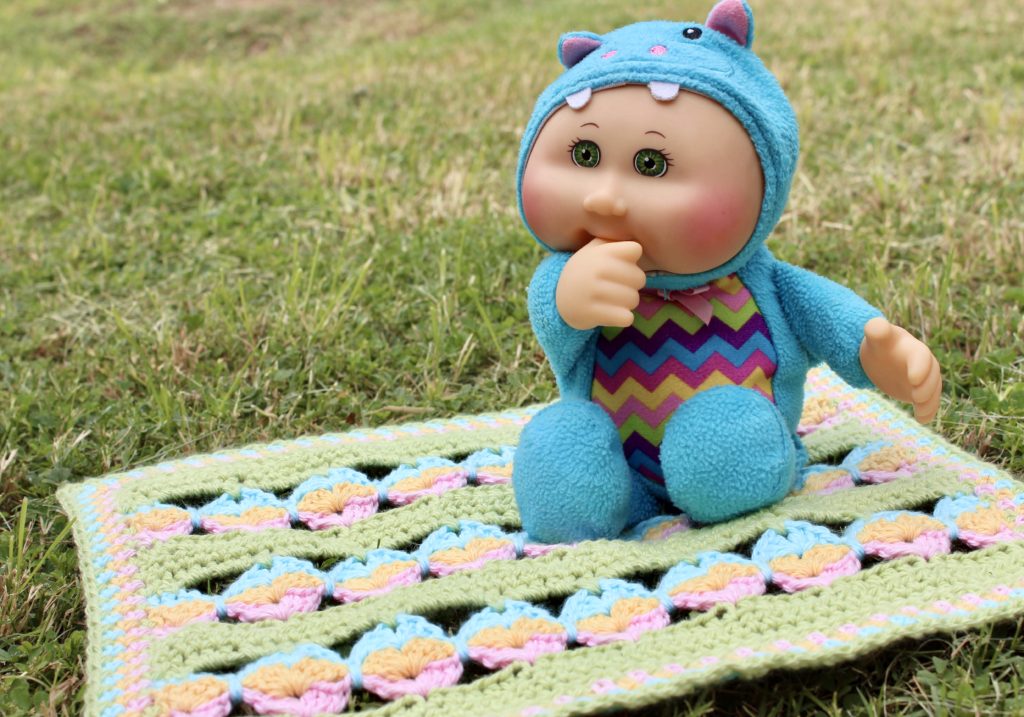
So, in celebration of the egg hunt and childhood, I have designed this cute little blanket to look like colourful eggs lined up on the grass just waiting to be picked up and gobbled up! And as a thank you for the love I have received from the wonderful online crochet community, I am sharing this pattern for free as a little Easter gift.
Egg Hunt Blanket Pattern
I have made a mini blanket for my son's baby (who is named Baby!) but I have included the starting count for making a larger blanket and the multiples so you can make it as large or small as you like.
US Crochet terms used.
Yarn: Any DK (8ply) weight yarn would work. I used Bendigo Woollen Mills 8ply cotton in Honeydew, Pink Rose, Daffodil and Arctic.
*You could use a different weight yarn though this will affect the size and you may need you adjust your starting count accordingly.
Hook: 4mm (or size needed for your yarn)
Multiples: 6 + 3 (if using fhdc)
6 + 4 (if using starting chain and the row of hdc where ch 2 counts as first stitch)
So for this mini blanket I used 8 x 6 = 48 + 3 = 51
For a larger blanket I would try 30 x 6 = 180 + 3 = 183. By my calculations this would make the blanket about 1 metre (39 inches) wide.

Important!
This blanket has a front and a back but they are both similar.
The front is the way that’s facing you when you begin and the 1st (pink) and 3rd (blue) egg rows will also face the front.
To keep this pattern facing the same way you need to make sure you Do Not Turn in row 4 (the first egg row in pink).
This means that the final row of hdc (grass) and the first row of the egg in pink are facing the same way. Every other row you turn.
Pattern
- In Honeydew (grass)
51 fhdc. *
(51 hdc)
*This photo and video tutorial from Fibre Flux shows how to do various foundation rows including foundation hdc. - Turn,
ch 2, *
hdc in the next st and each stitch across.
(51 hdc)
*ch 2 counts as first hdc. You can use an alternative chainless turning hdc here if you prefer. - Turn,
ch 2,
hdc in the next st and each stitch across.
Break yarn and weave in ends.
(51 hdc) - In Pink Rose (1st egg row)
Do Not Turn,
Standing dc* in the first hdc,
3 dc in the next hdc,
[ ch 2, sk 5 sts,
(3 dc, ch 1, 3 dc) in the next hdc ] 7 times
ch 2, sk 5 sts,
3 dc in the next hdc,
dc in the last hdc,
Break yarn and weave in ends.
(50 dc, 7 ch 1 sps, 8 ch 2 sps)
*Standing stitches are used when joining a new colour and replace join with sl st and beginning chains.
This tutorial by Helen of Crystals and Crochet is helpful if you'd like to learn how to do these.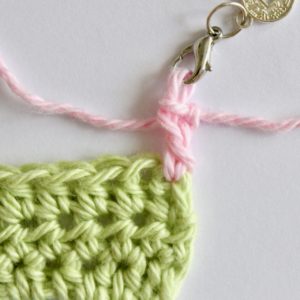
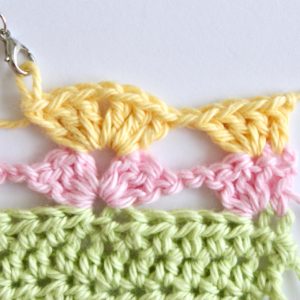
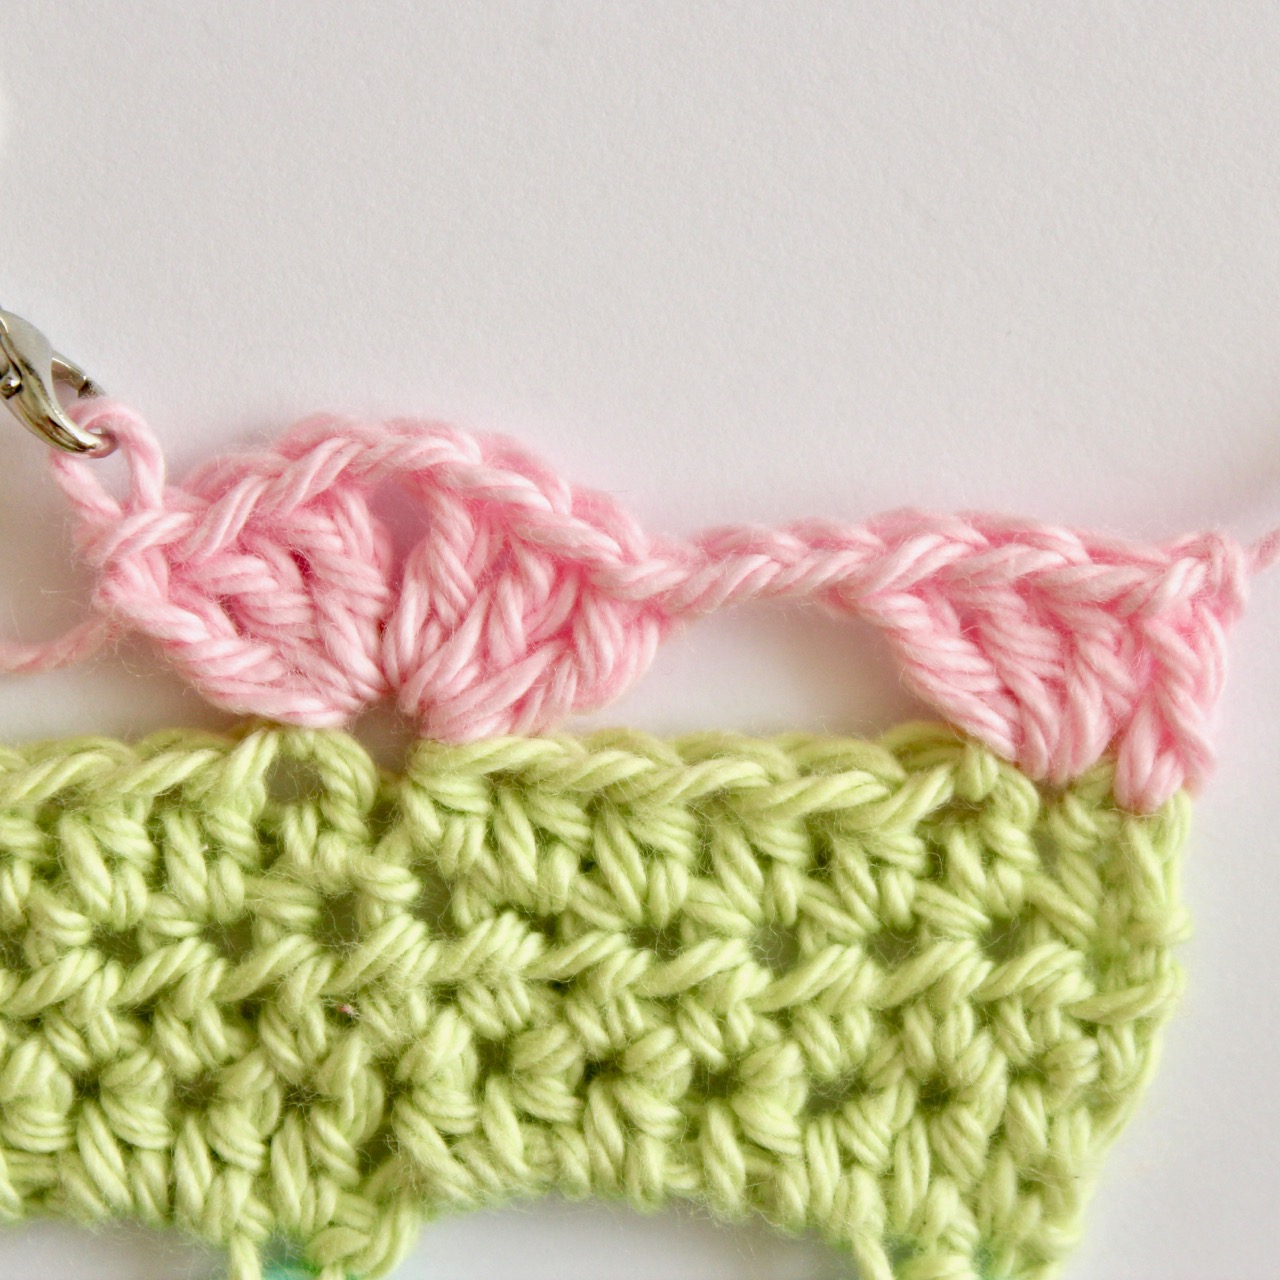
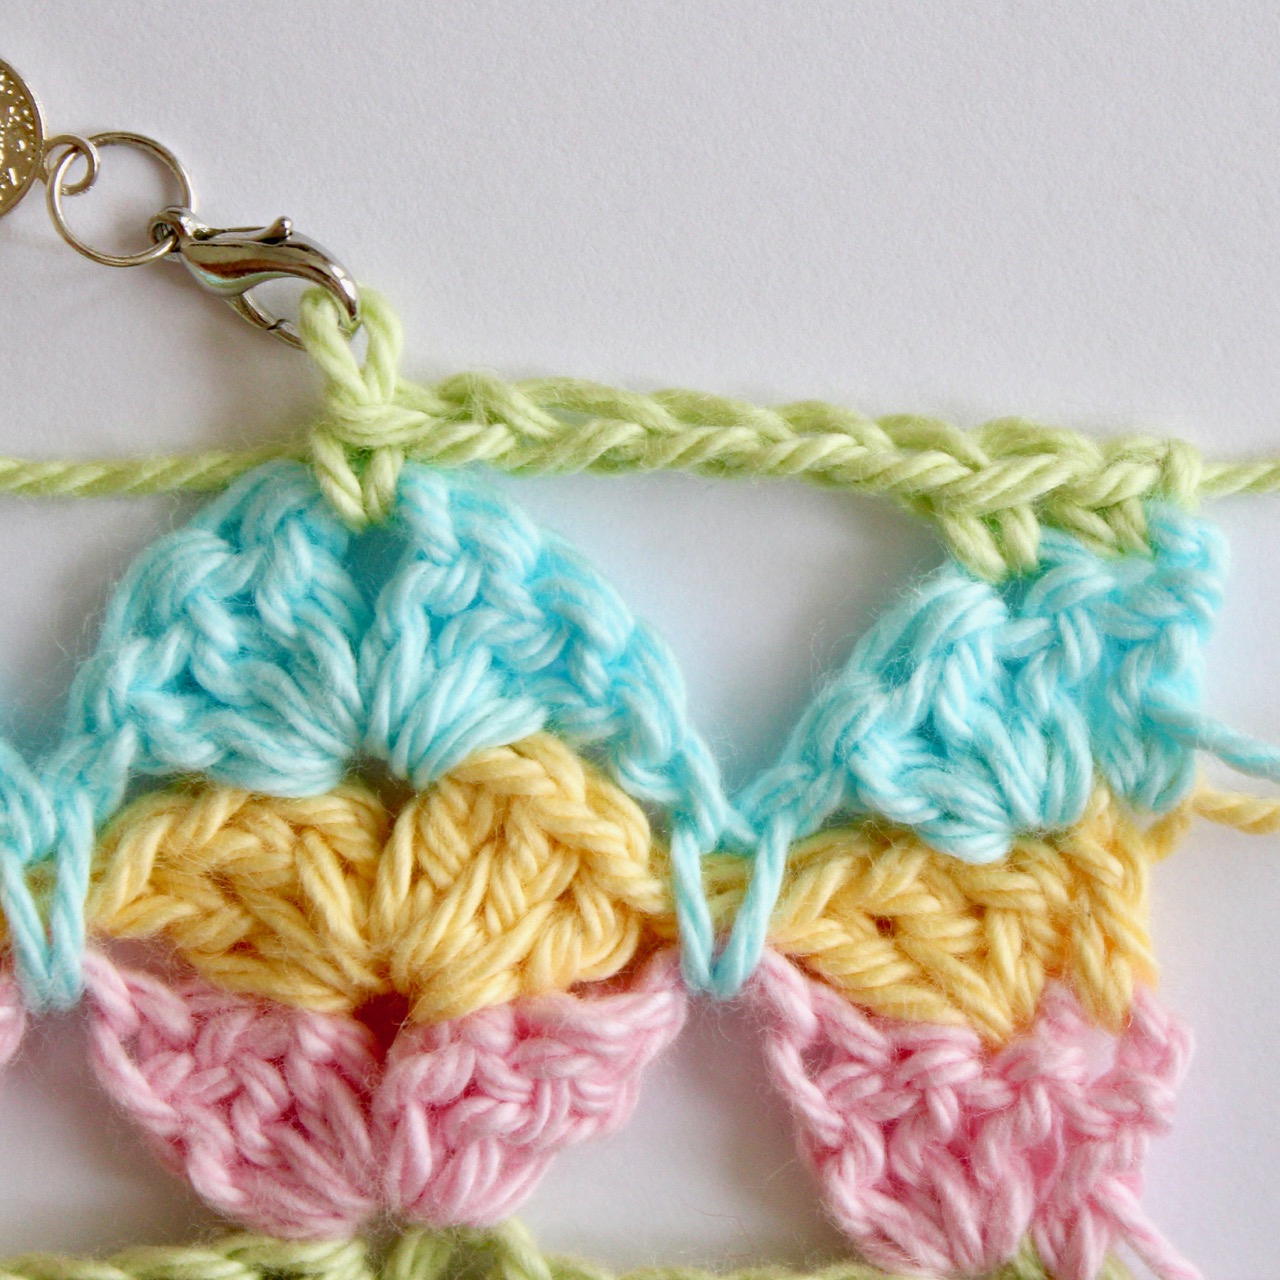
Do Not Turn! Standing dc in first hdc.
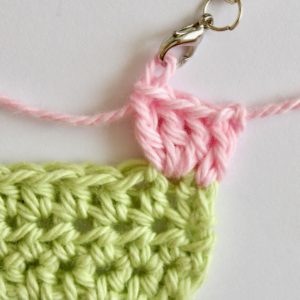
3 dc in the next hdc. 
For each egg. Ch 2, sk 5 sts, (3 dc, ch 1, 3 dc) in the next hdc.
End of the row. Ch 2, sk 5 sts, 3 dc in the next hdc, dc in the last hdc.
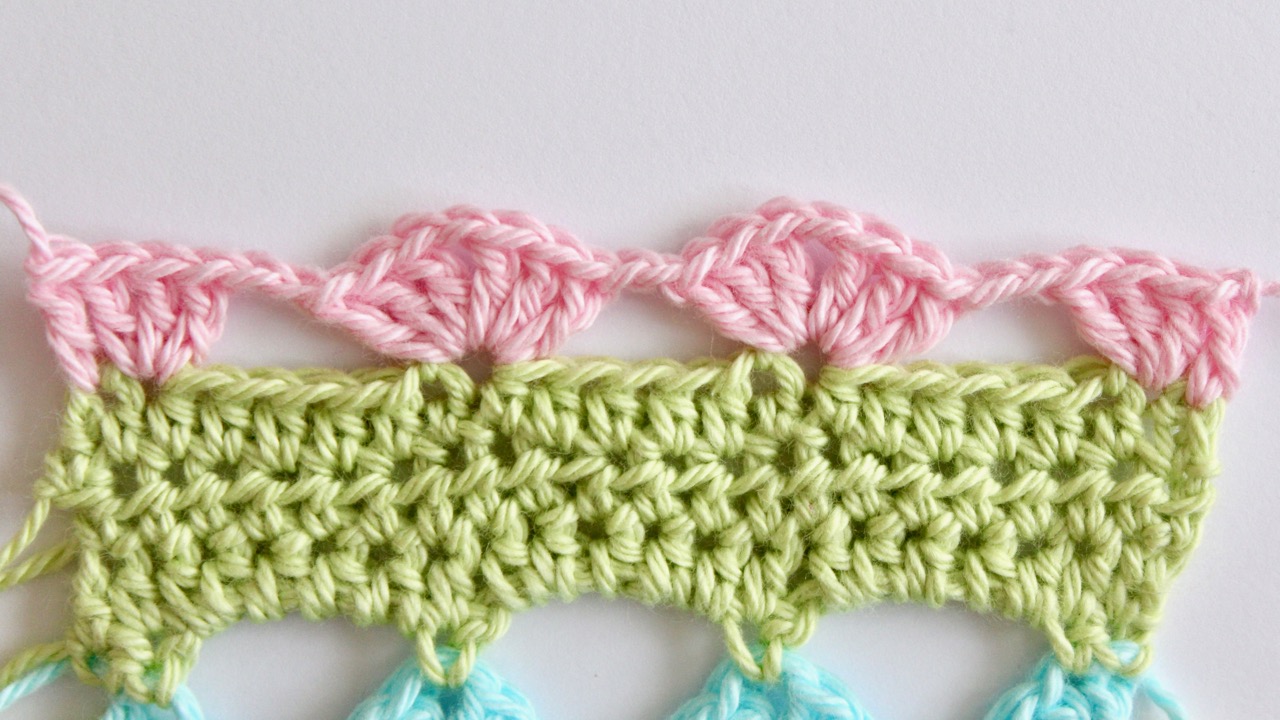
Here you can see what will be 2 full eggs and 2 half eggs on the outside edges. - In Daffodil (2nd egg row)
Turn,
Standing dc in the first dc,
3 dc in the next dc,
ch 1, sk next 5 dc and ch 2 sp,
(3 dc, ch 1, 3 dc) in the ch 1 sp *
[ ch 1, sk next 6 dc and ch 2 sp,
(3 dc, ch 1, 3 dc) in the ch 1 sp] 6 times
ch 1, sk next 5 dc and ch 2 sp,
3 dc in the next dc,
dc in the last dc,
Break yarn and weave in ends.
(50 dc, 15 ch 1 sps)
*this ch 1 space falls between the 2 clusters of 3 dc in the previous row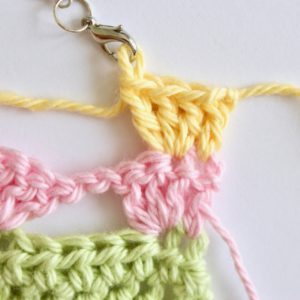
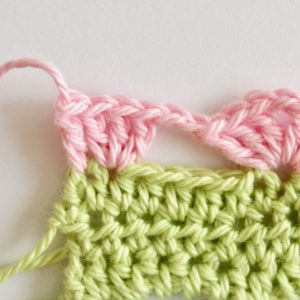
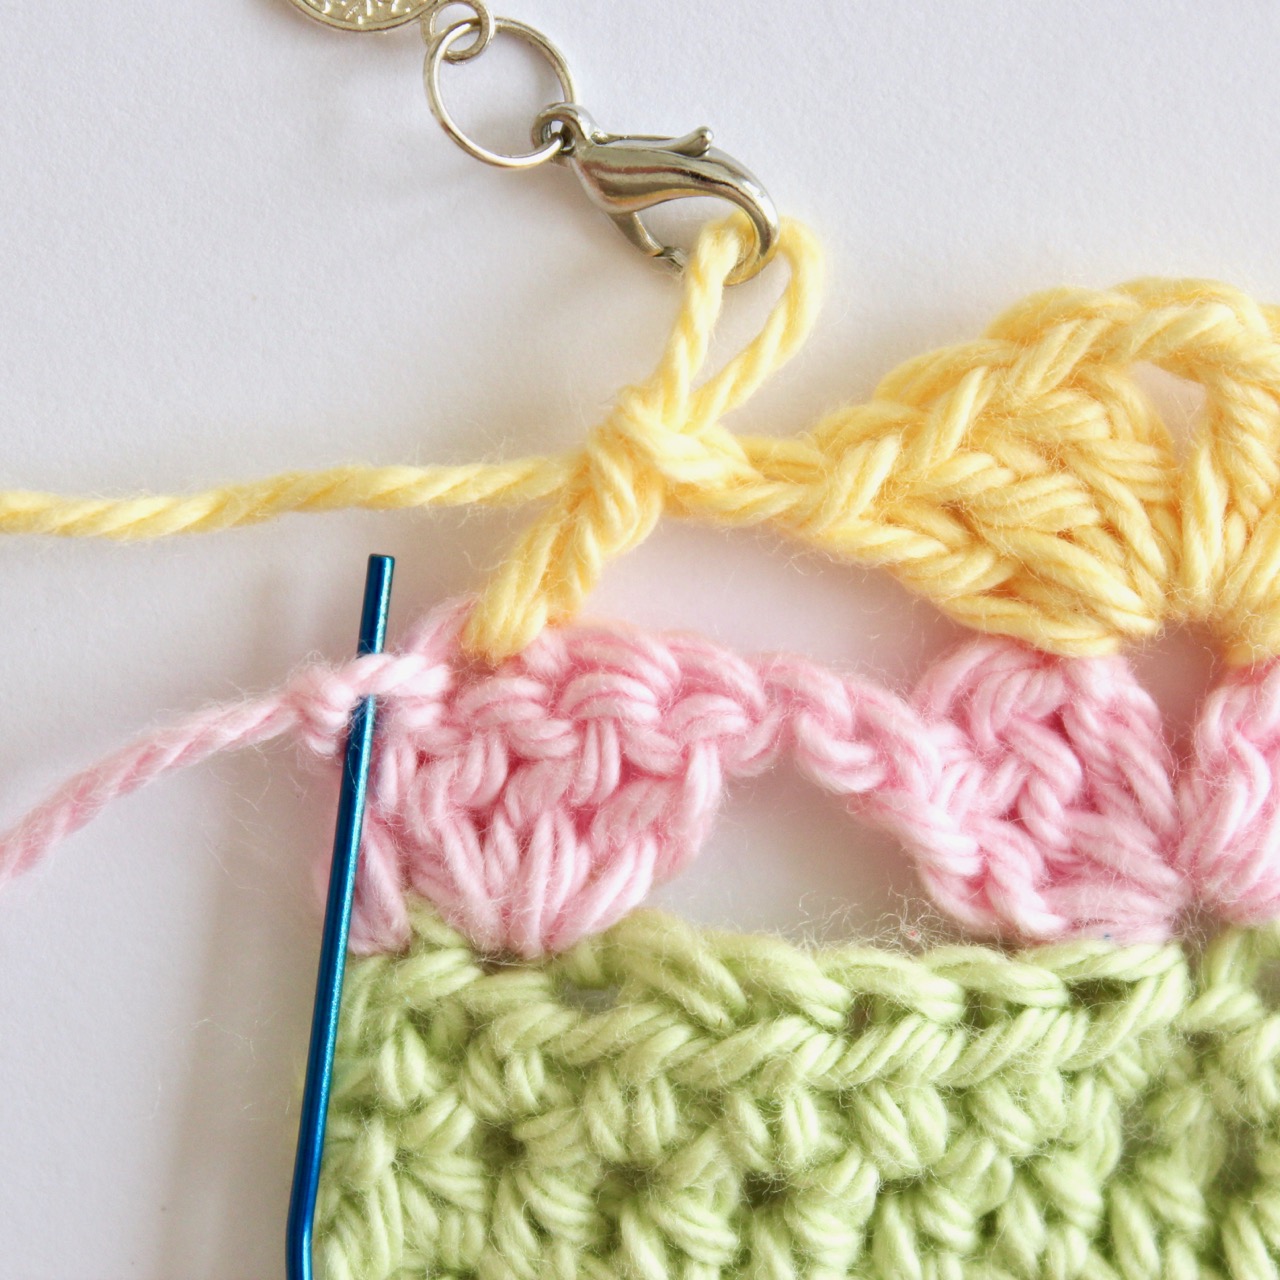
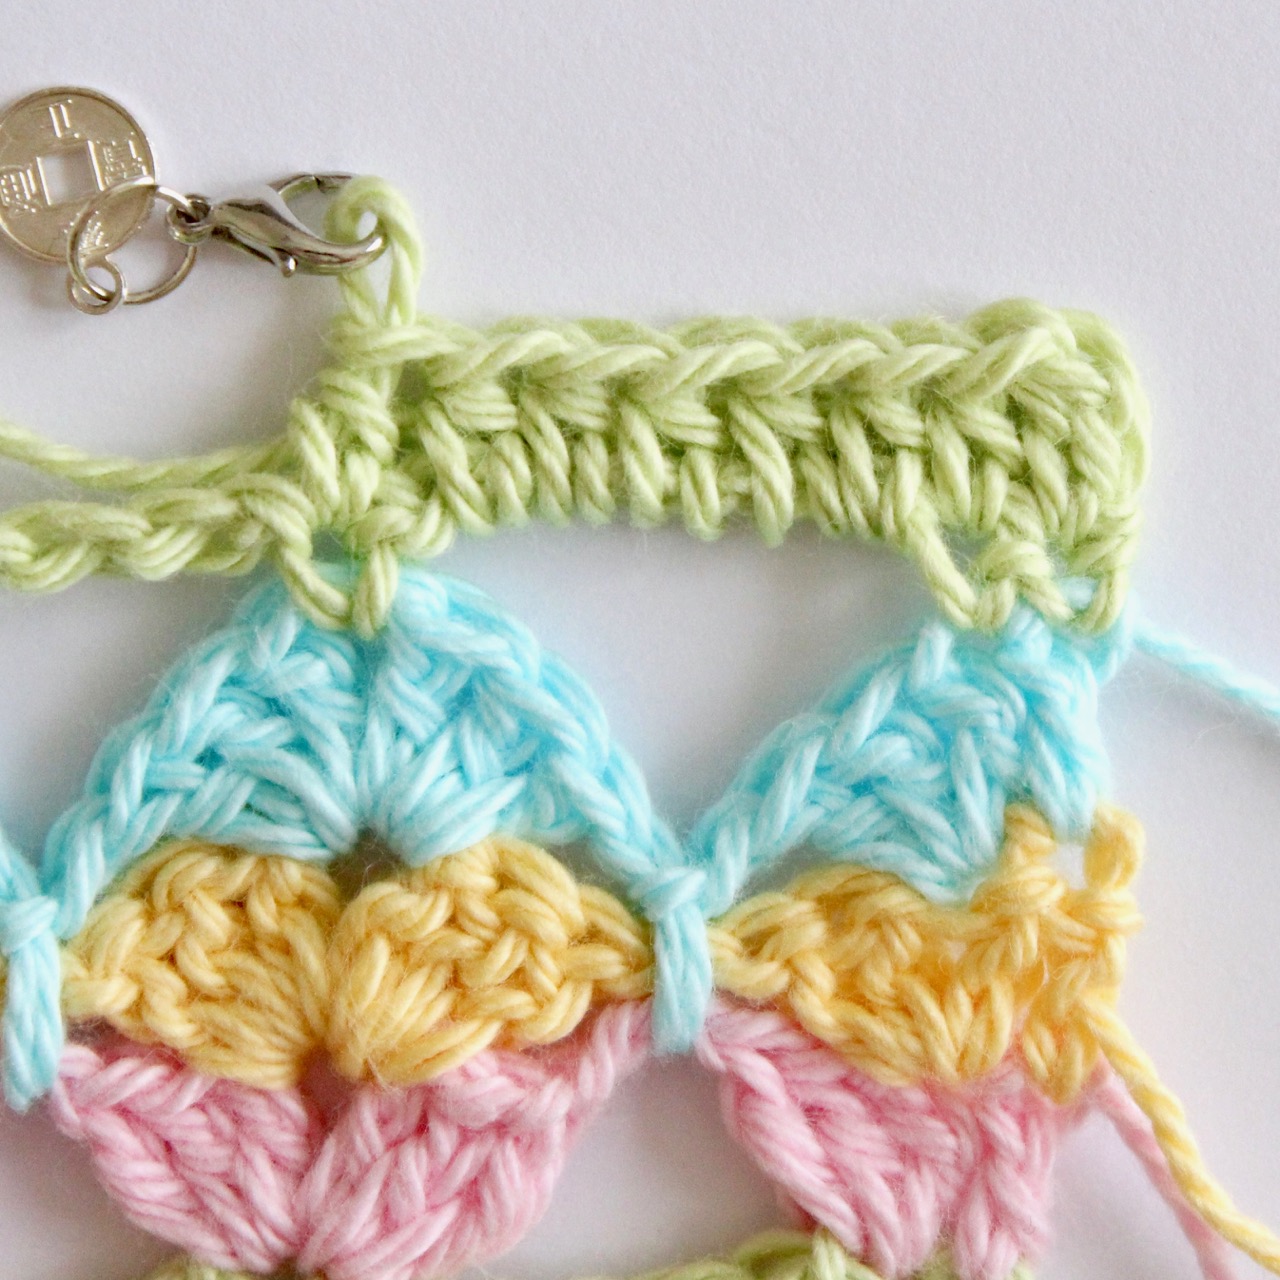
Turn! Standing dc in the first dc, 3 dc in the next dc.
Just like the beginning of the last row.
Ch 1, sk next 5 dc and ch 2 sp (these are the stitches between the eggs. (3 dc, ch 1, 3 dc) in the ch 1 sp which falls between the 2 clusters of 3 dc in the previous row.
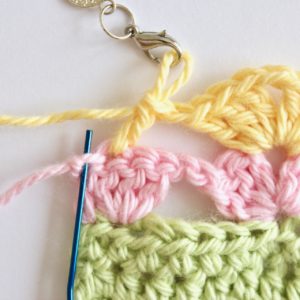
Ch 1, sk next 5 dc and ch 2 sp, 3 dc in the next dc (which is the 2nd last stitch of the row). The blue paperclip shows where the last stitch is.
Row 5 with 2 full eggs and 2 half eggs on the outer edges. - In Arctic (3rd egg row)
Turn,
Standing dc in the first dc,
3 dc in the next dc,
sk next 2 dc,
ch 1, sl st over the ch 1 and ch 2 sp of 2 previous rows *, ch 1,
sk next 3 dc,
(3 dc, ch 1, 3 dc) in the ch 1 sp,
[ sk next 3 dc,
ch 1, sl st over the ch 1 and ch 2 sp of 2 previous rows, ch 1,
sk next 3 dc,
(3 dc, ch 1, 3 dc) in the ch 1 sp ] 6 times
sk next 3 dc,
ch 1, sl st over the ch 1 and ch 2 sp of 2 previous rows, ch 1,
sk next 2 dc,
3 dc in the next dc,
dc in the last dc,
Break yarn and weave in ends.
(50 dc, 8 sl sts, 23 ch 1 sps)
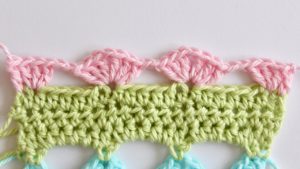
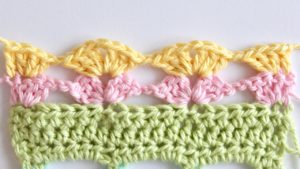
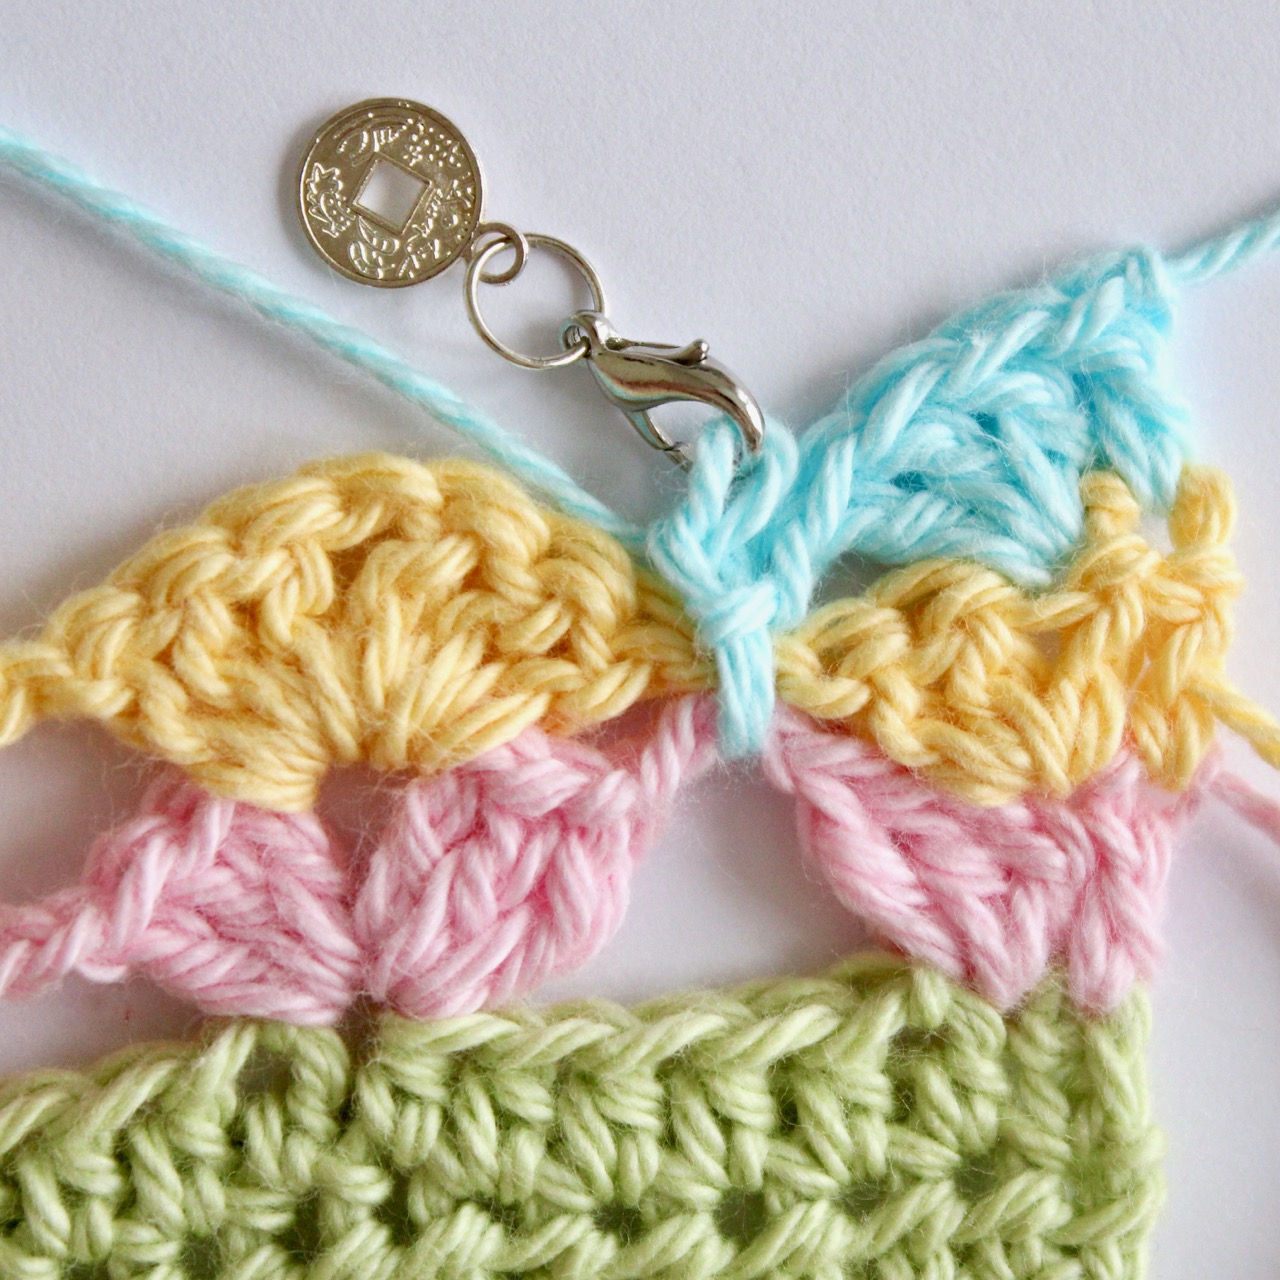
*these ch sps are between the eggs. Keep sl st fairly loose - they help frame the egg and create the rounded edges.
The sl st encloses the ch sps on the previous rows that fall between the eggs. Don’t pull the sl st too tight.
The blue paperclip shows where the sl st goes – around the ch sps. 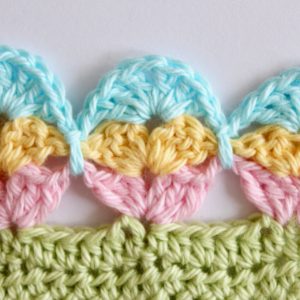
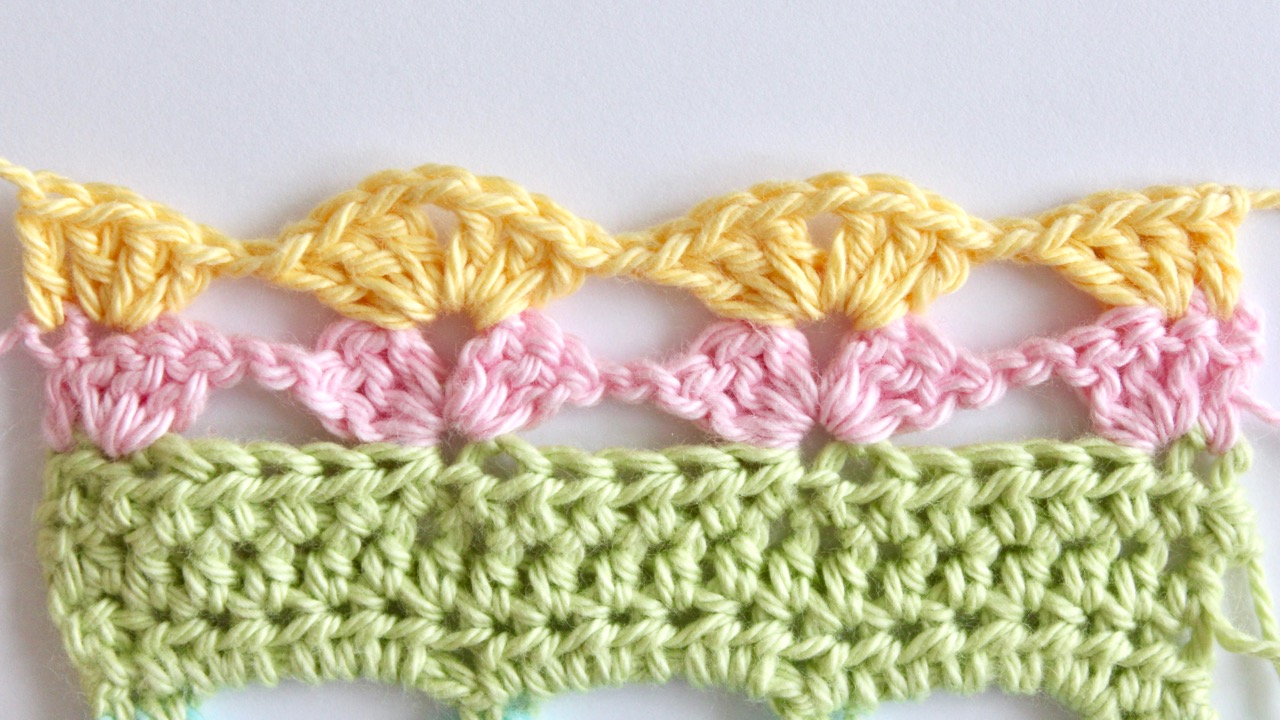
Here you can see how the sl sts shape the eggs and outline them. - In Honeydew (grass)
Turn,
Standing sc in the first dc,
sc in the next dc,
ch 5, sk 8 sts,
sc in ch 1 sp *
[ ch 5, sk 9 sts,
sc in ch 1 sp ] 6 times
ch 5, sk 8 sts,
sc in the next dc *
sc in the last dc.
(11 sc, 8 ch 5 sps)
*this ch 1 space falls between the 2 clusters of 3 dc in the previous row
*this is the second last dc
Standing sc in the first dc, sc in the next dc, ch . Sk 8 sts (all the way to the centre of the next egg), sc in ch 1 sp.
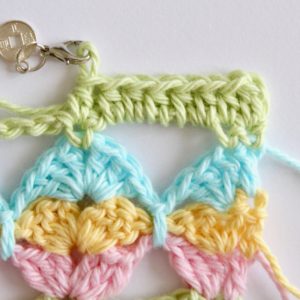
Ch 2, hdc in the sc, 5 hdc in ch 5 sp (don’t worry if these seem a little loose) . Hdc in sc (this is the one in the centre of the egg).
- Turn,
ch 2 *
hdc in the sc,
[ 5 hdc in ch 5 sp,
hdc in sc ] 8 times
hdc in last sc.
(51 hdc)
*ch 2 counts as first hdc. You can use an alternative chainless turning hdc here if you prefer. - Repeat from Row 2.


Repeat Rows 2 to 8 until the blanket is the desired size then finish with an extra Row 2 and 3 to complete the final band of grass.
I did 3 rows of eggs plus the final rows for the last band of grass making 24 rows total.
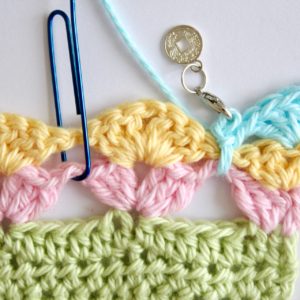
Edging
I edged my mini blanket using moss stitch (sc, ch 1) in Honeydew, Pink Rose, Daffodil, Arctic then a final row of Honeydew.
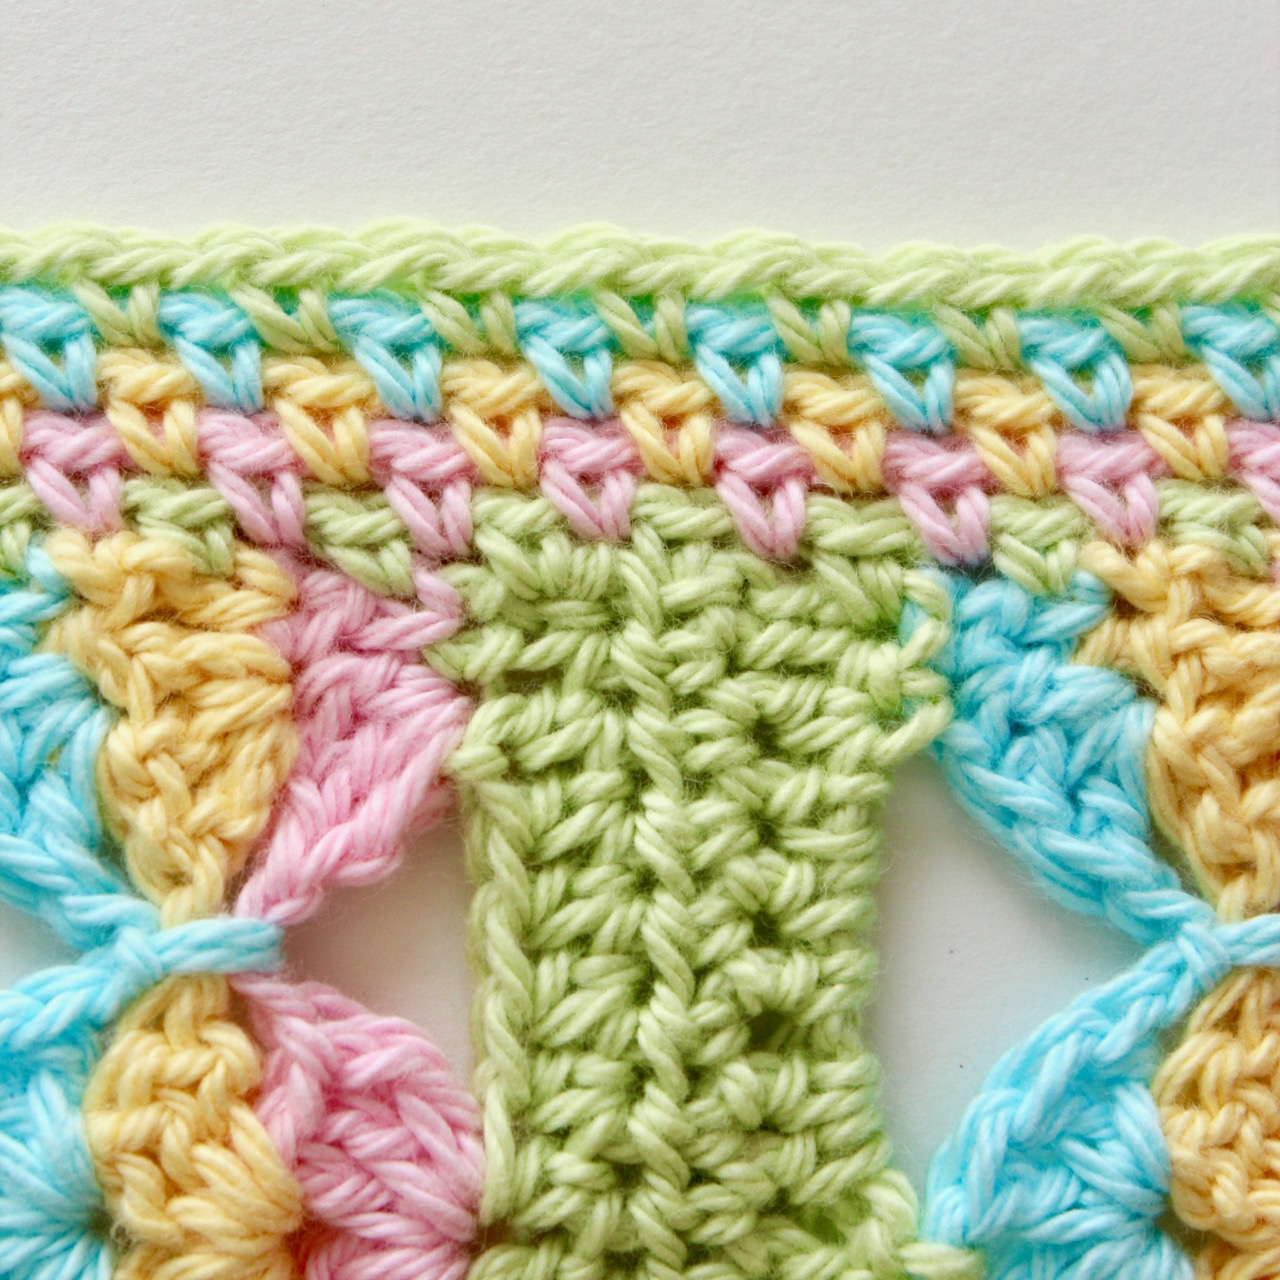
In the first row I did one sc, ch 1 in each row going up the sides and (sc, ch 1, sk 1) across the top and bottom with a ch 2 in the corners.
In each of the next rows the sc goes in the ch 1 sp with a (sc, ch 2, sc) in each ch 2 corner.
Don’t stress too much about your stitch placement in the first edging round, just try to make it as even as you can. It will even out in the next row if it’s slightly off. Moss stitch is quite forgiving which is why I chose it for the edging here!
This is the first round of the edging in green.
I think this pattern would look cute as a blanket, pillow, table runner or scarf, so have a play around and let me know what you come up with.
You can purchase an inexpensive, downloadable, printable PDF version of this pattern, with additional information to help you create a range of projects, in my Etsy shop here if you would like to use this pattern offline.
Share on Instagram with #egghuntblanket or tag me @vividkreations.
Or post a pic to my Facebook page. I'd love to see what you make.
Cheers 😊

Your blanket is really cute and looks like fun to crochet. Can you tell me how the size/dimensions of your mini blanket? I’d like to make on for 18″ dolls (American girl doll). I see that the pattern is adaptable, but wondering if your stitch counts would work as is. Thanks very much for this cute pattern.
Mary
Hi Mary,
Thank you for your lovely comments about my pattern – it really is quite fun to crochet.
Sorry for not including the finished measurements in the post but here they are for you now. The mini blanket is 32 cms (just over 12 in) wide and 25.5 cms (10 in) high. Well that’s the size is it now after being played with and scrunched up for the last 10 months 🙂
Good luck and I’d love to see what you come up with, so send me a pic if you remember!
Cheers,
Mikaela
So adorable! Are the instructions in British or American? I could see this as a large afghan using variegated yarn for the eggs! 💘💙💝
Thanks Lin 💕 I hadn’t thought of variegated yarn for the eggs but I can picture it now and it would look amazing.
The instructions are in American terms. Sorry for not mentioning that, I’ll add it in as soon as I get a chance.
Love the pattern, just tried it out! Going to make a table runner size now! Tagged you on Insta!
It looks fantastic. I’m glad you like the pattern and found it easy to adapt to a table runner.